 Help Center
Welcome to the guide on how to place a case in debt support. This guide will walk you through the step-by-step process of searching for debtors, selecting a specific case, and accessing the necessary information. Follow the instructions below to effectively navigate the application and place a case in debt support.
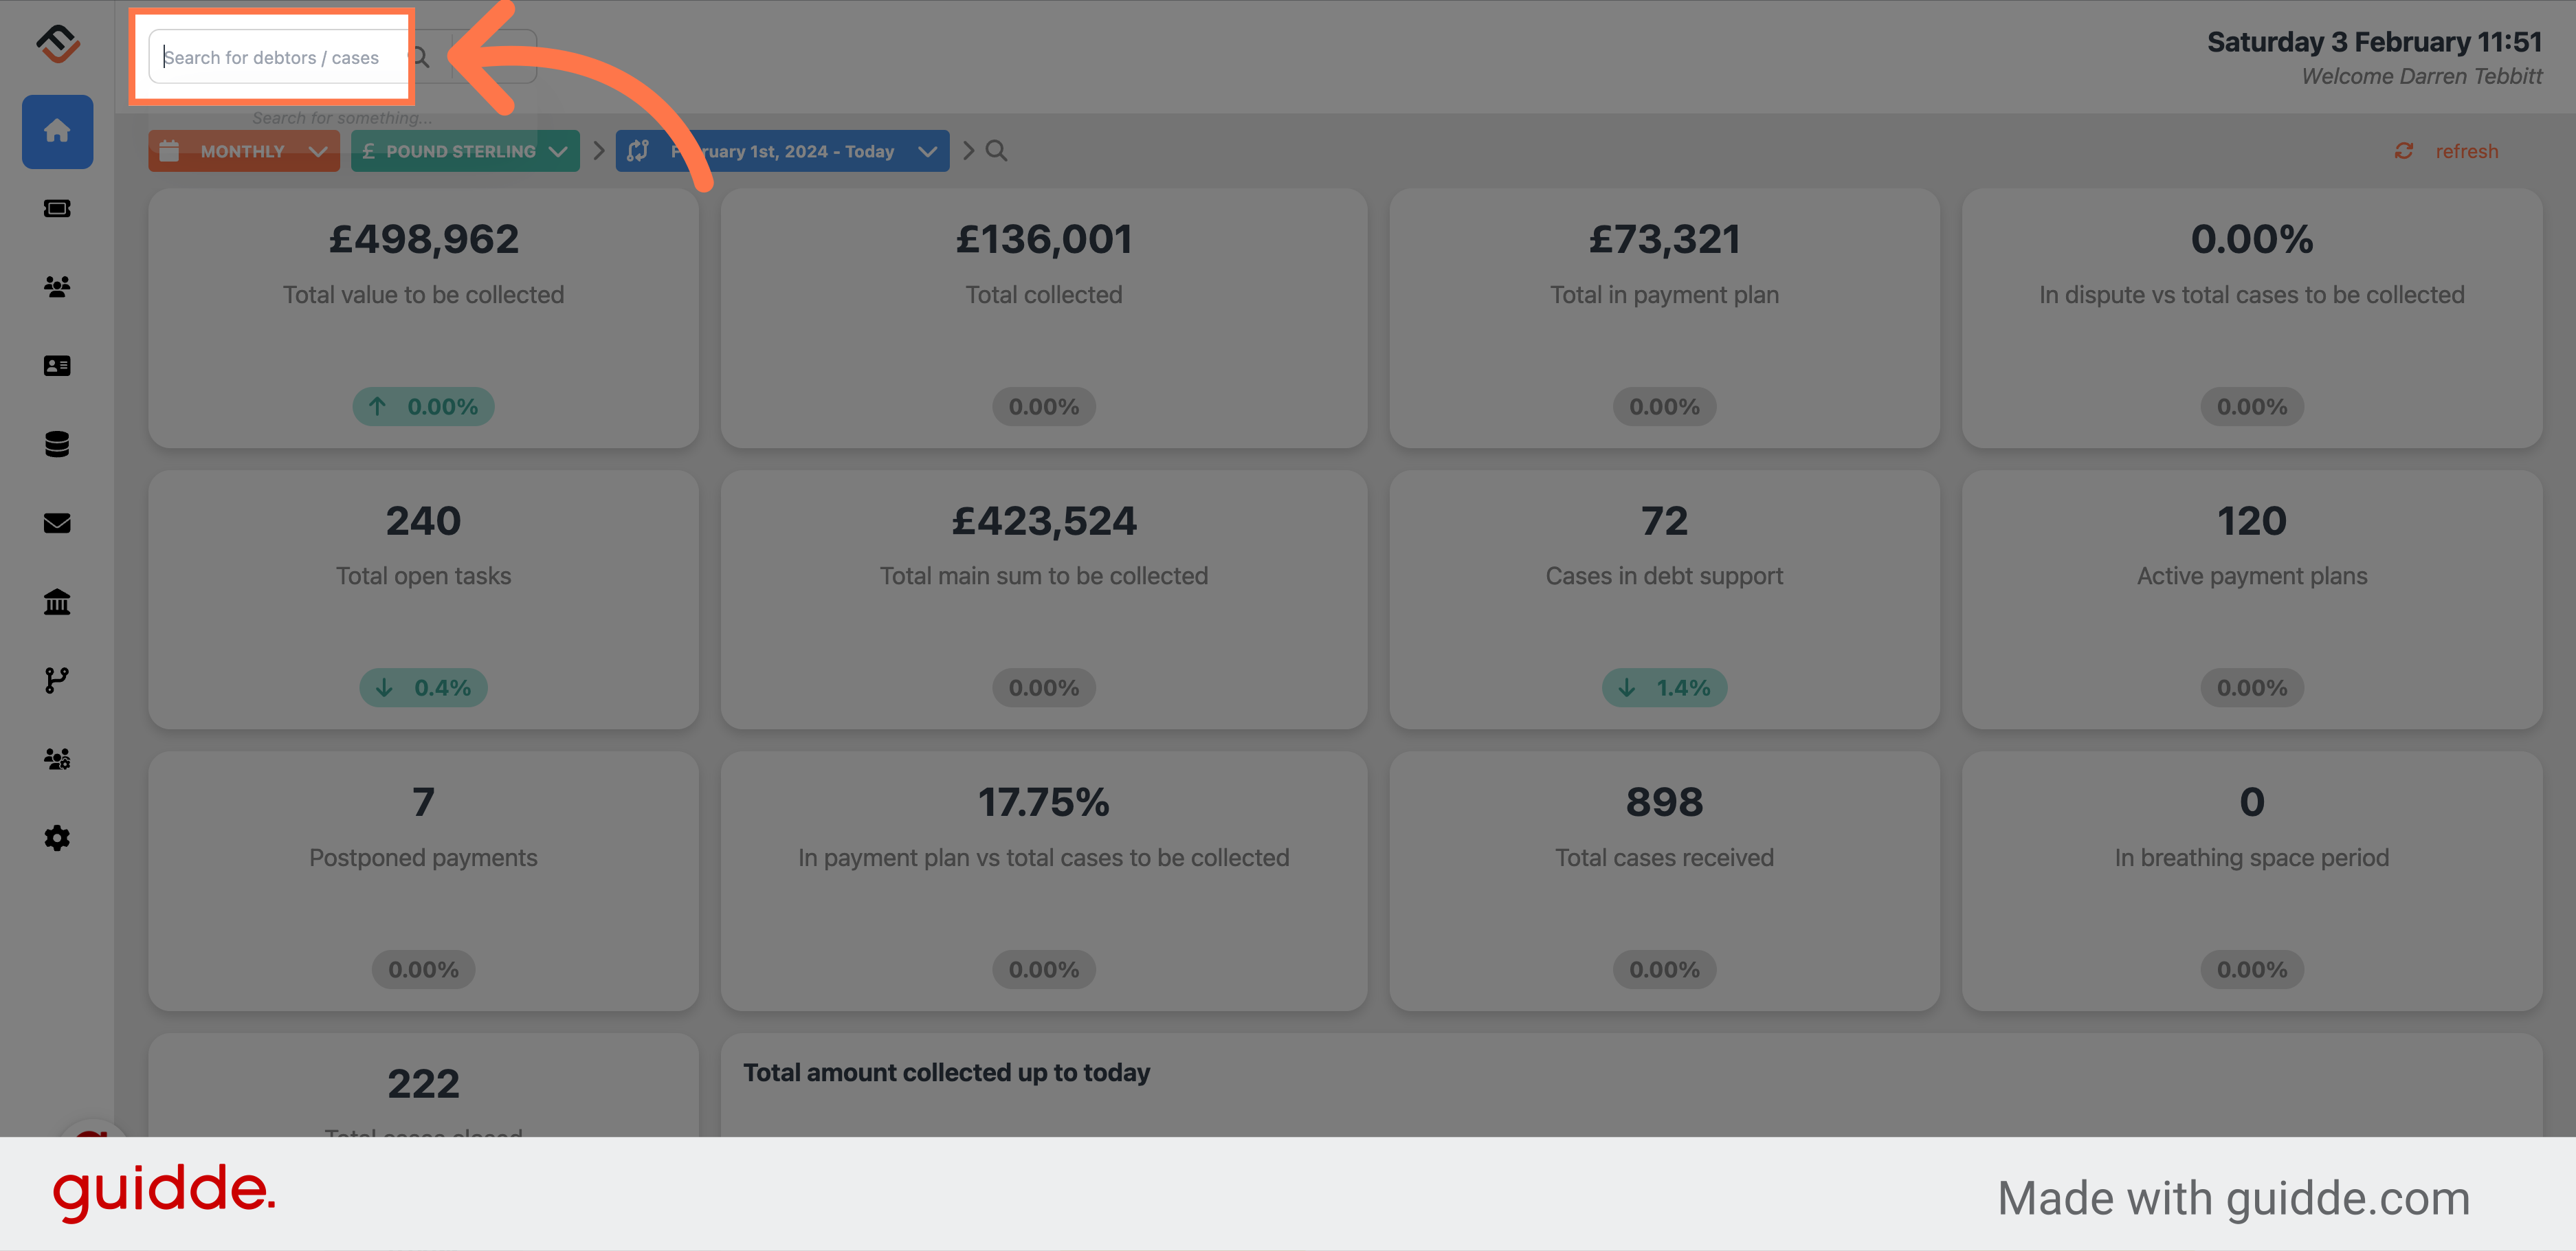
1. Search for your case
Search for your case using name, case number, invoice number, or email and telephone numbers.
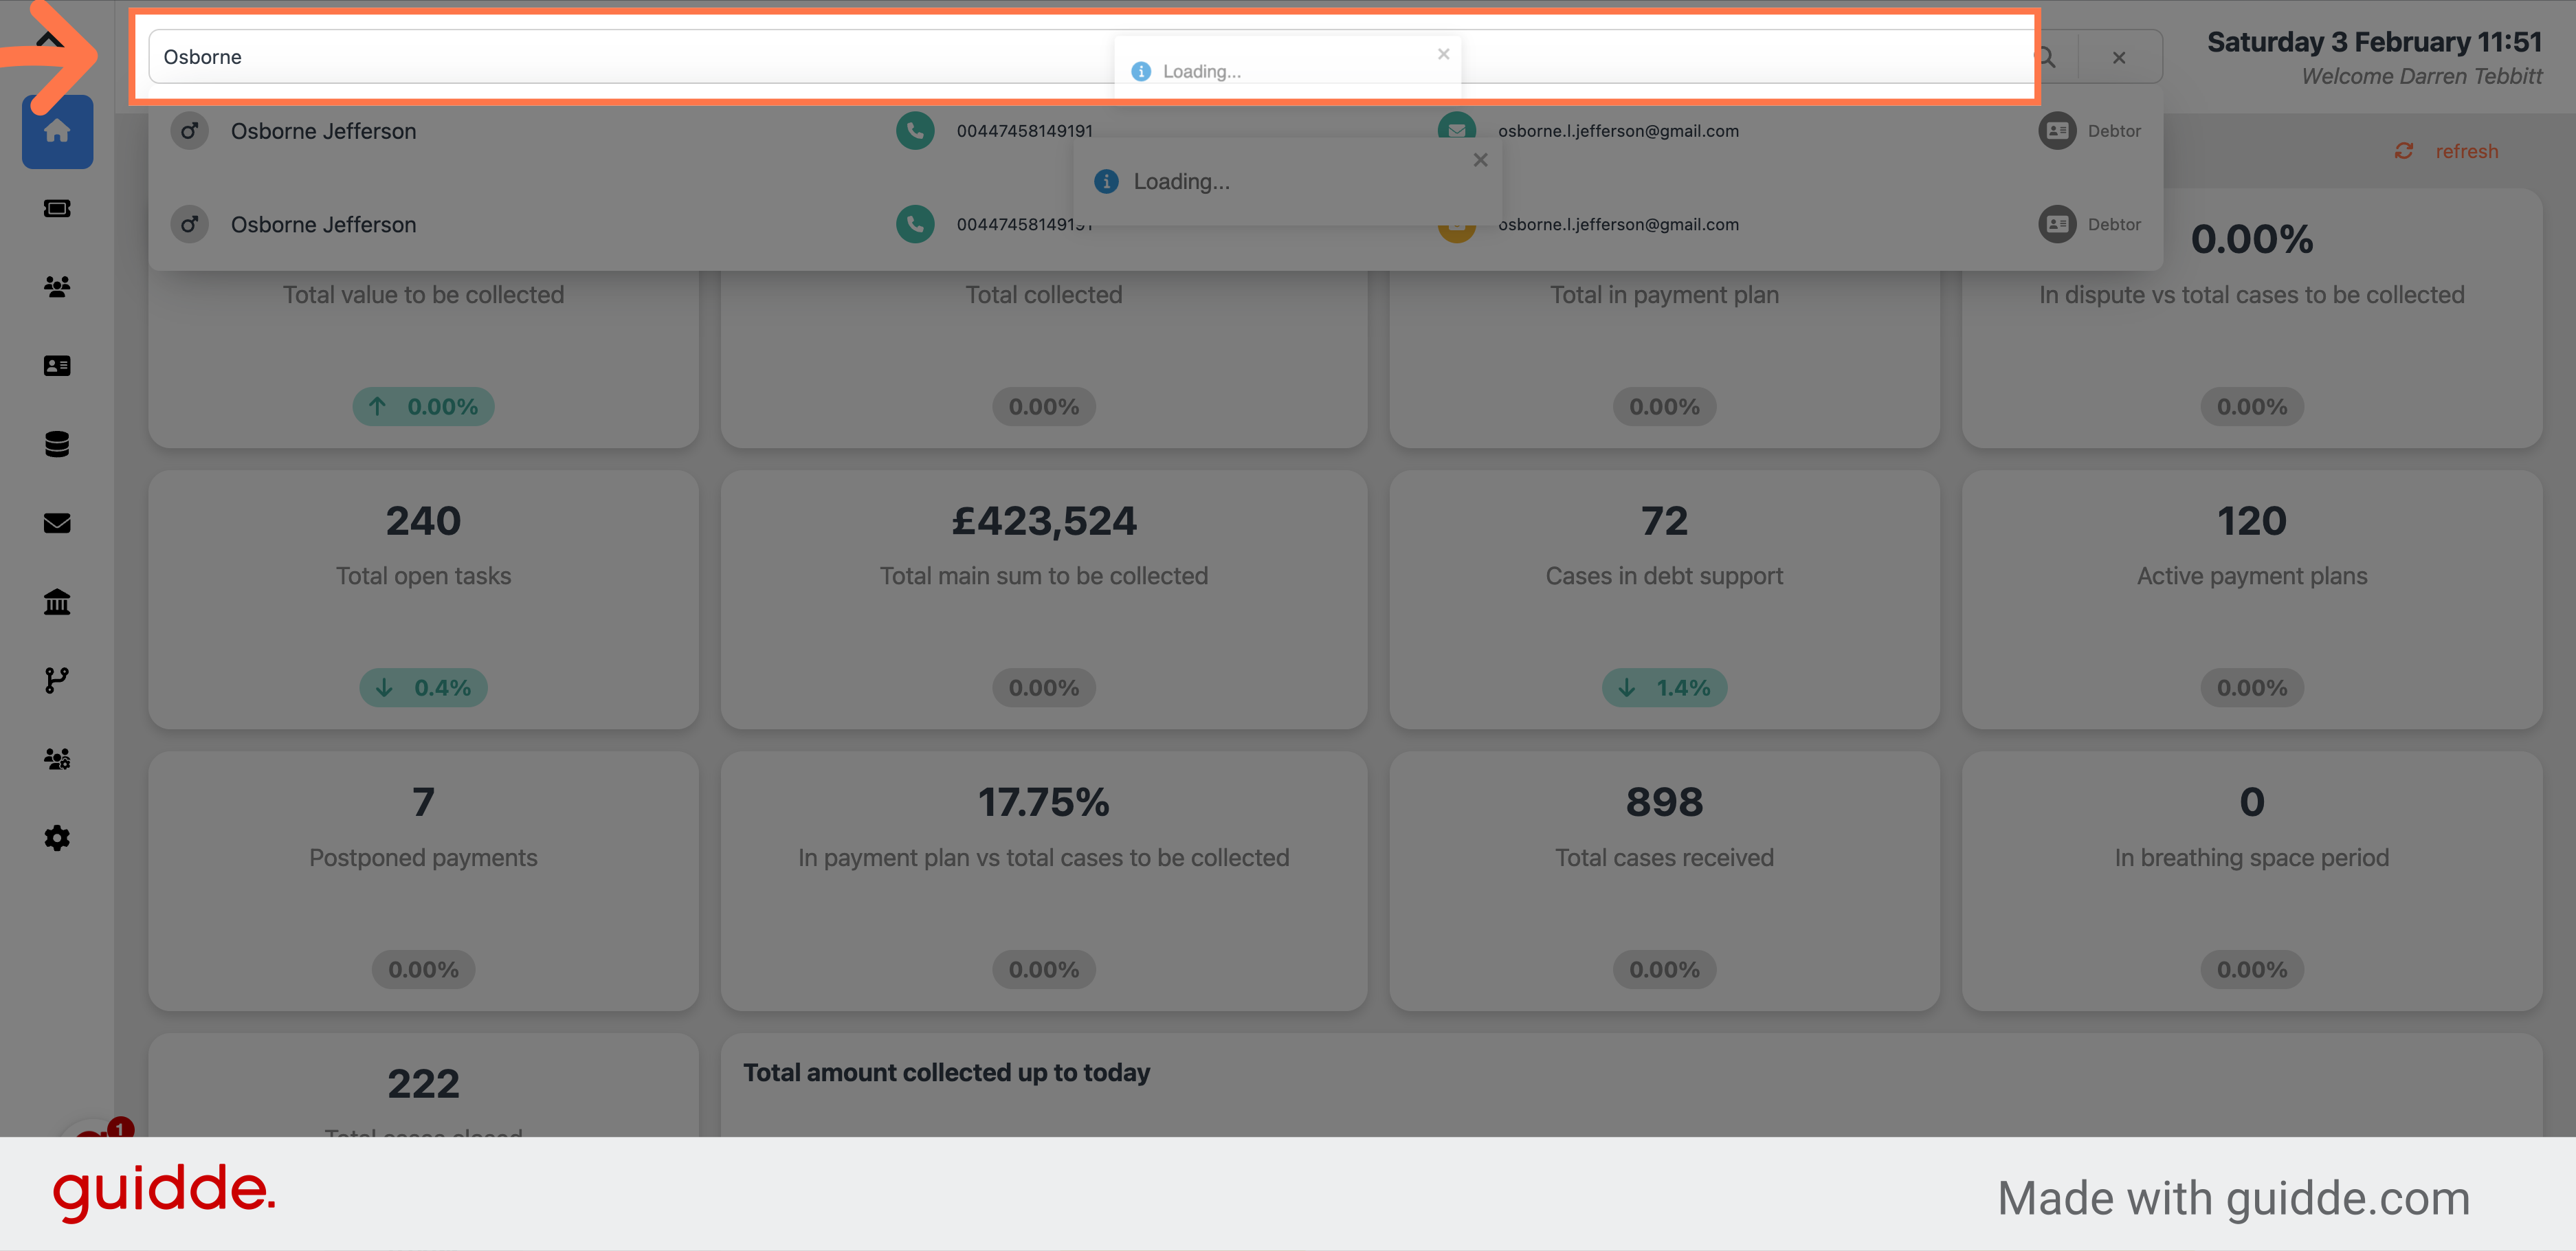
2. Enter the information
For this example we will use Osborne Jefferson.
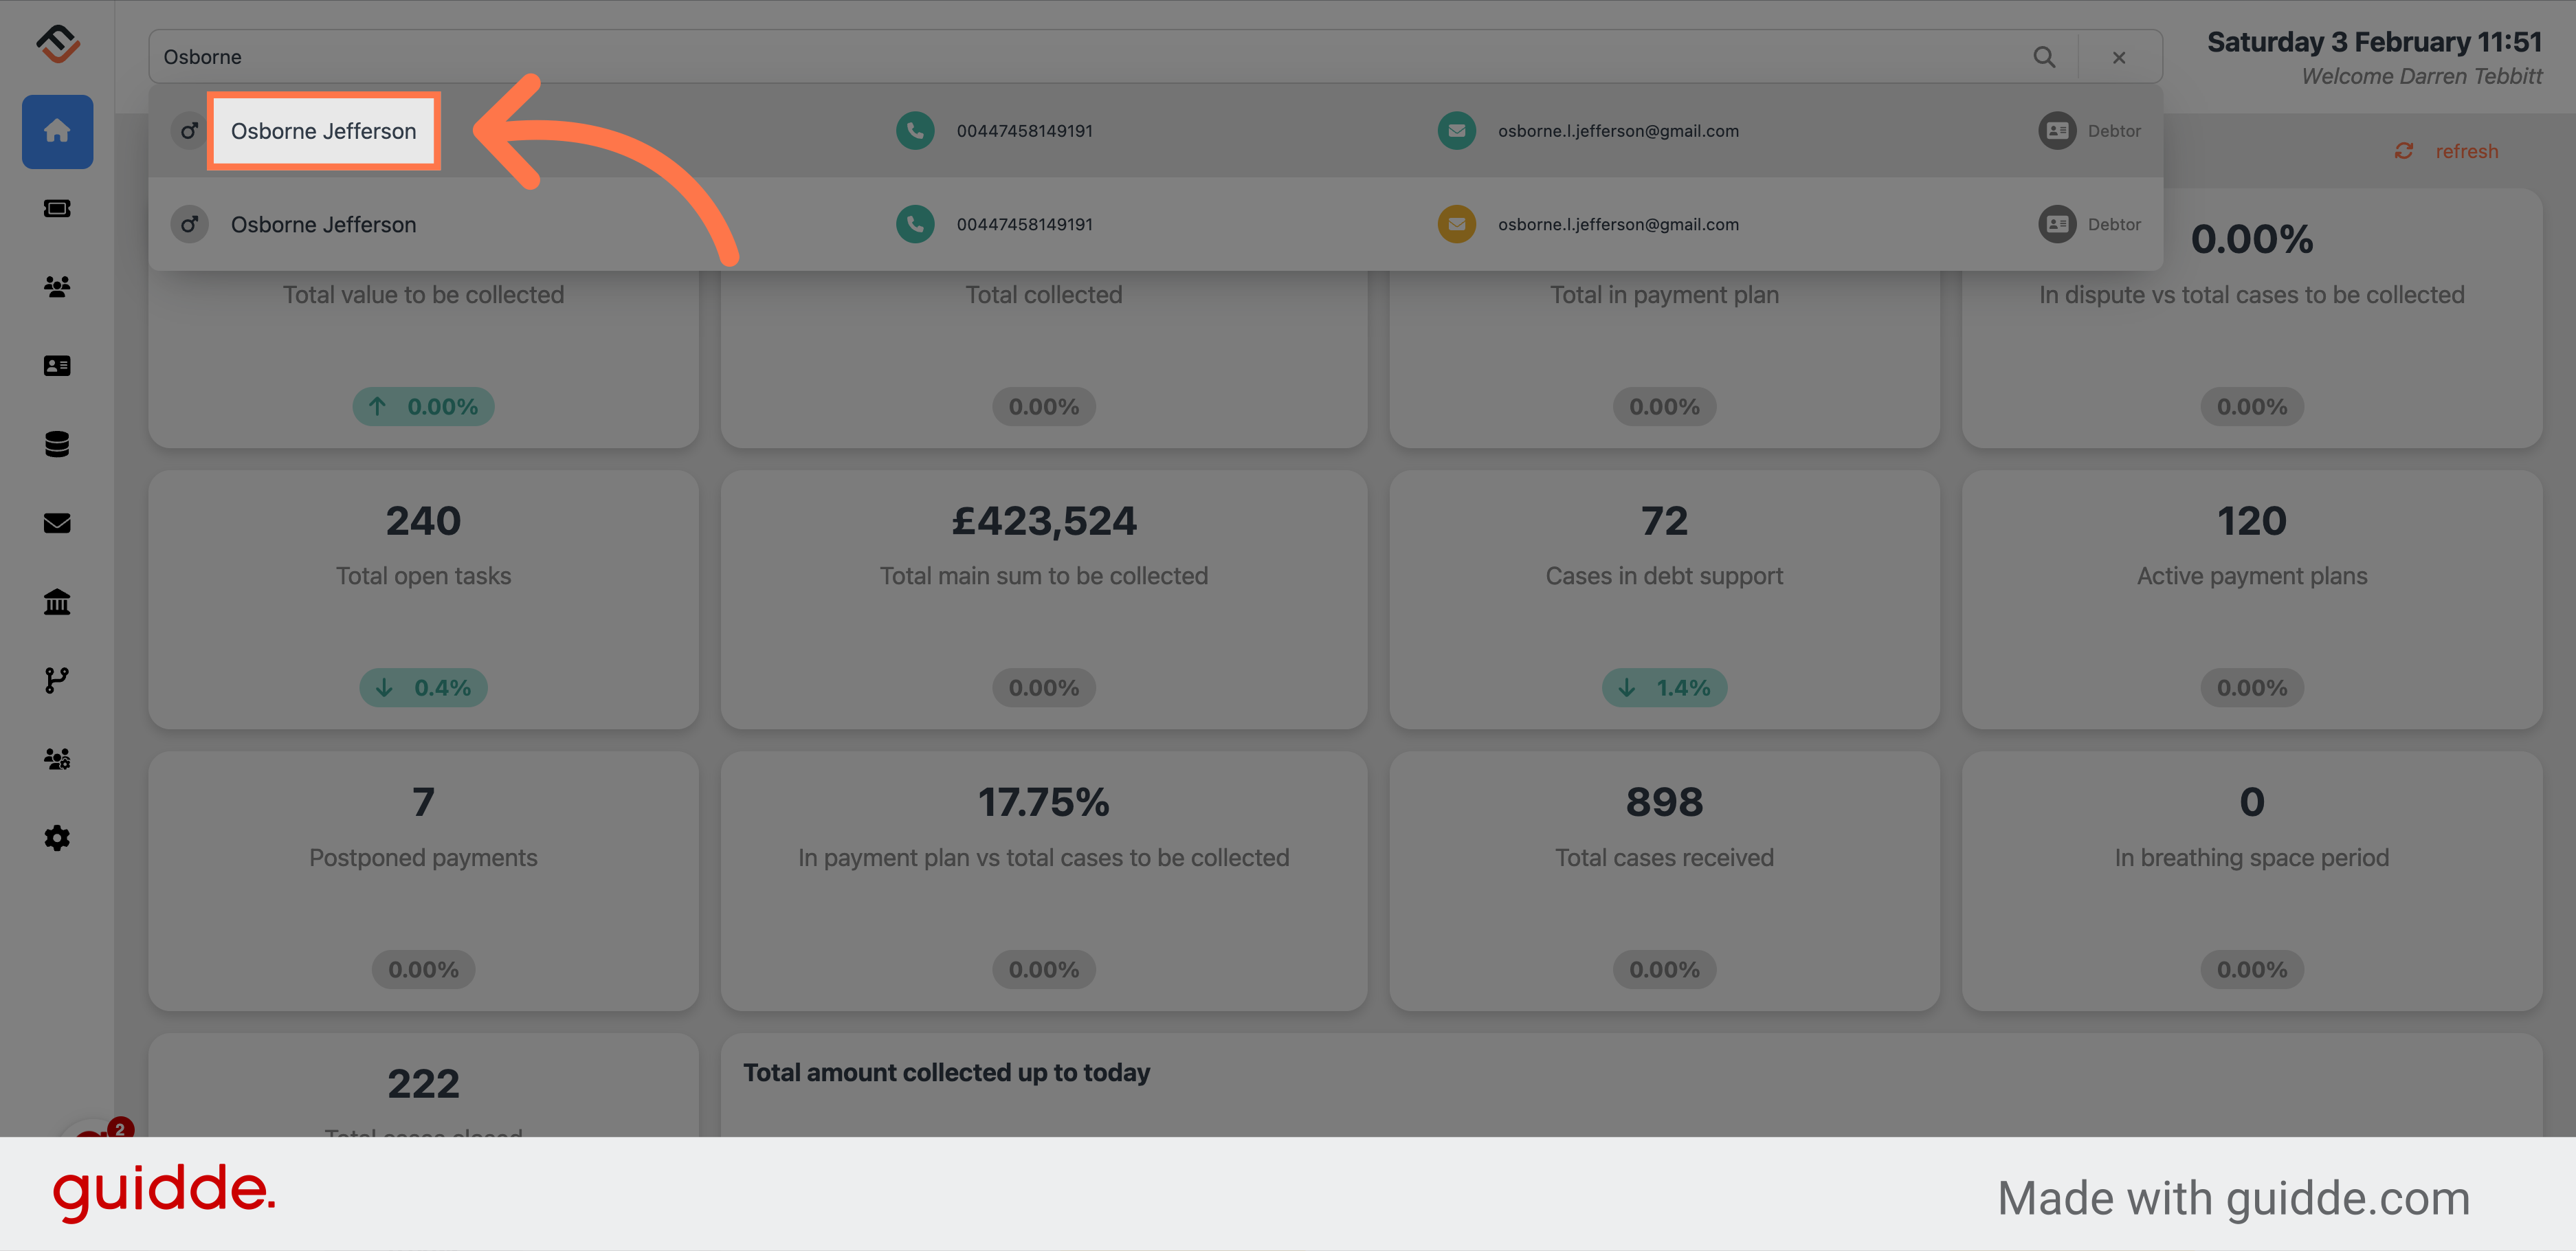
3. Click on the result
From the search result, click on the right case.
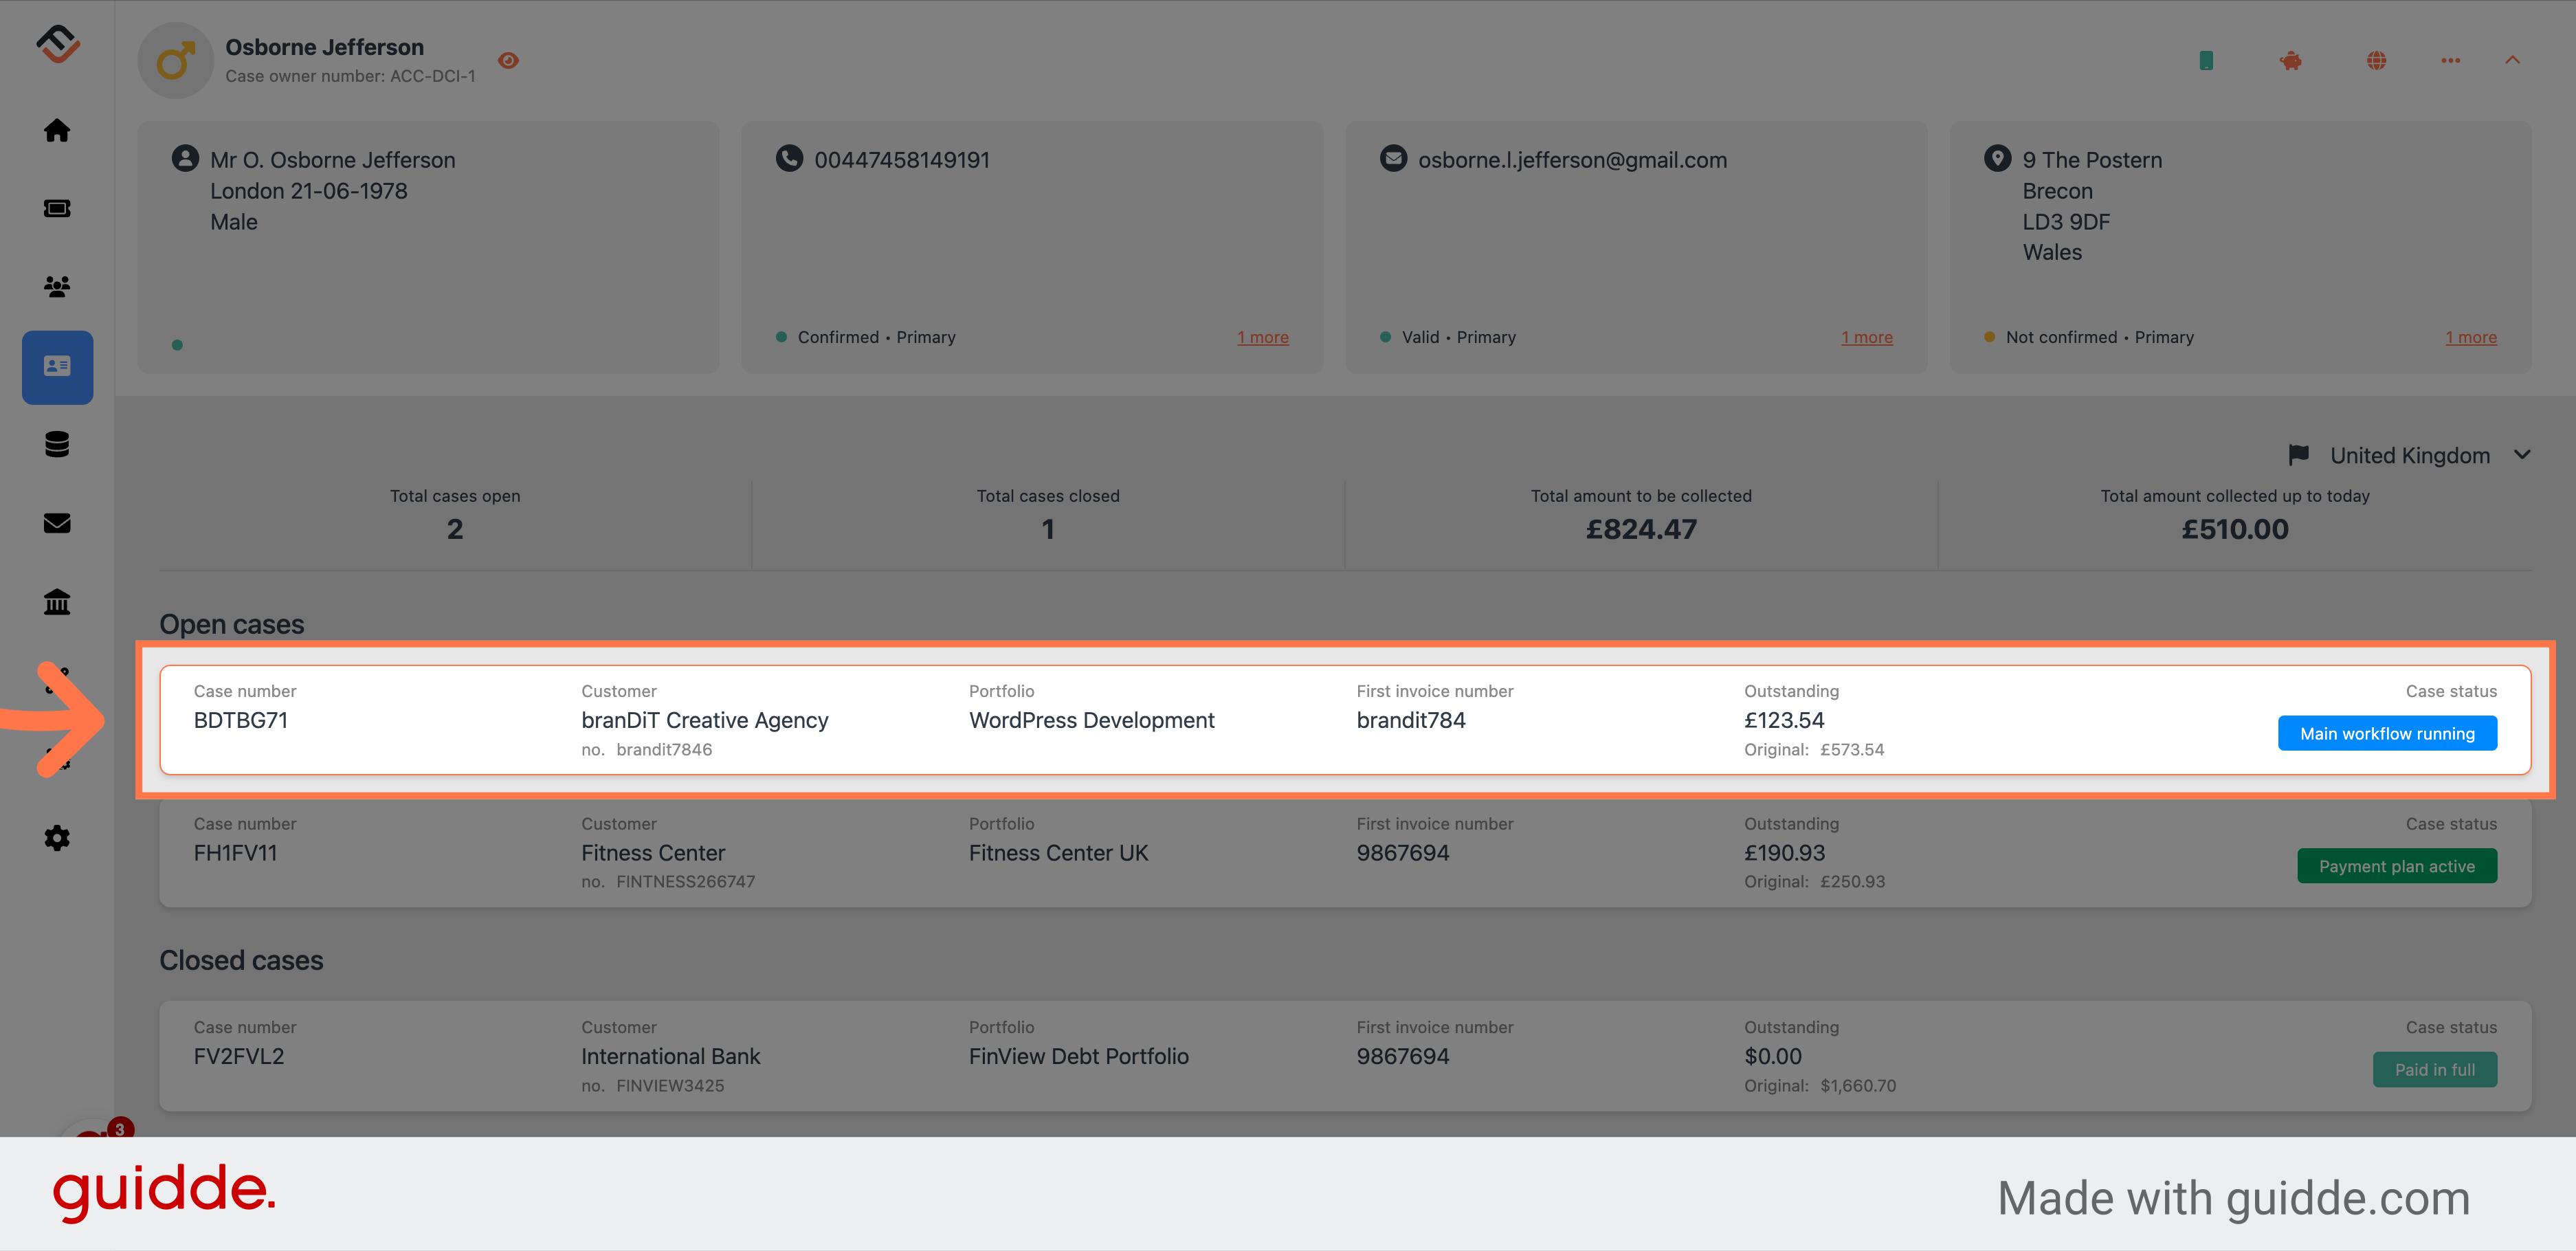
4. Select the case
From the cases section, select the case you want to access. You can use your mouse to hover over the case which will highlight in orange.
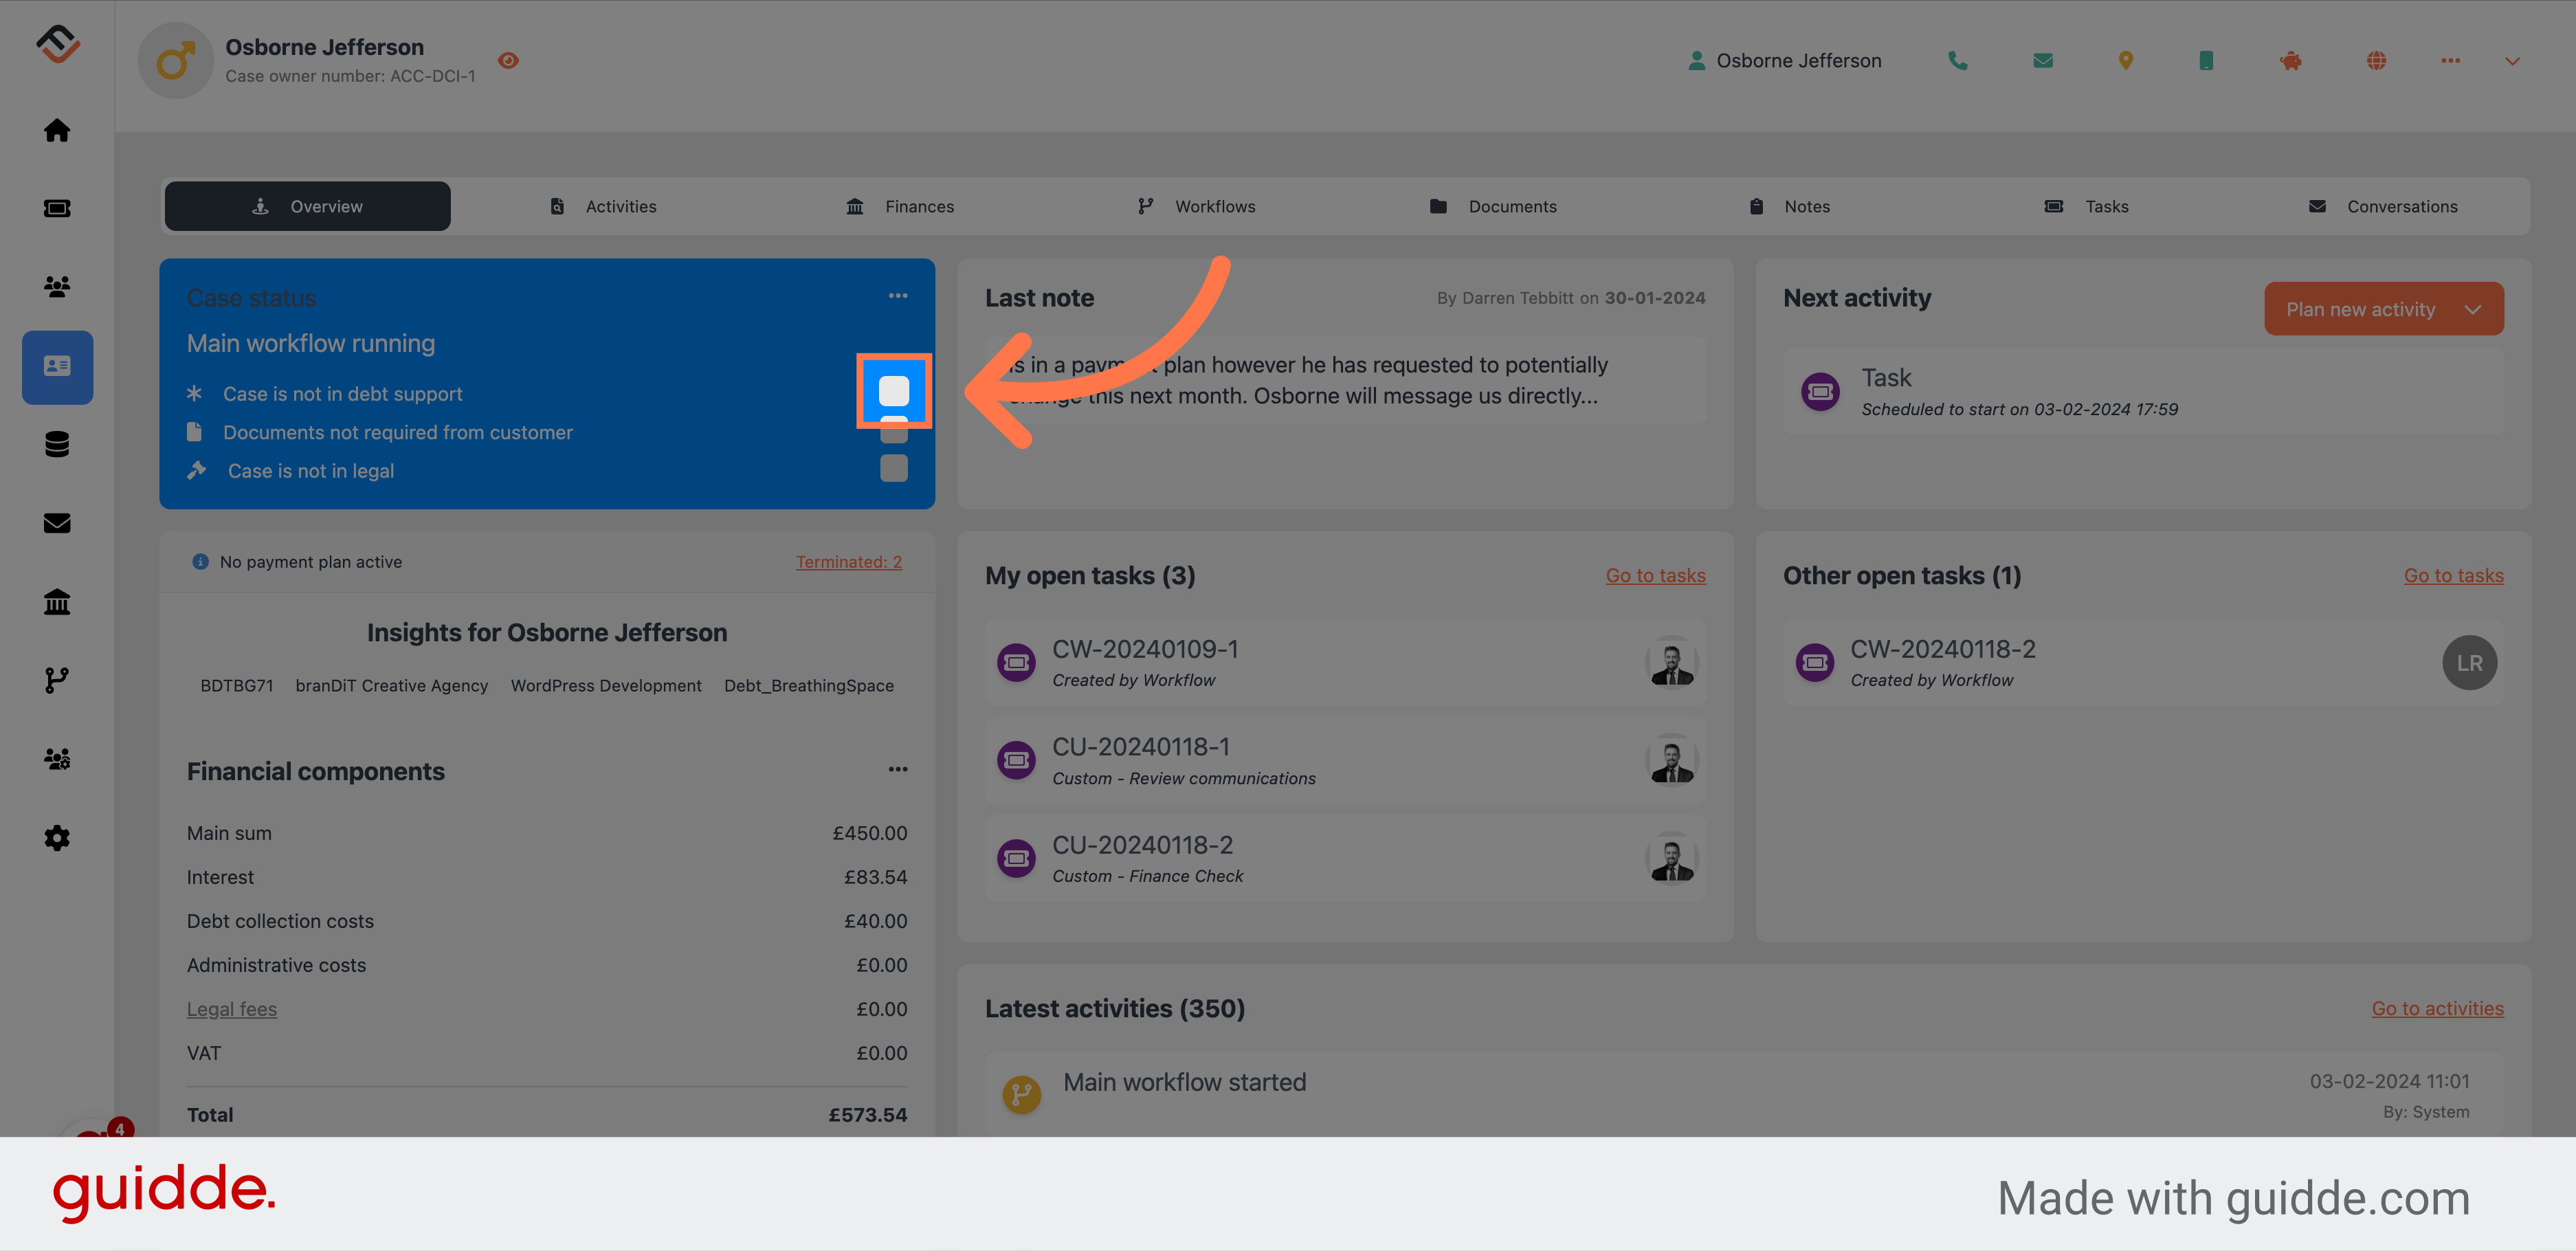
5. Place the case in debt support in the Case status box
In the case status box, click the box on next to "Case is not in debt support". The system will transition this case into debt support and record this activity in the activities panel.
Once the case status is updated, FinView automatically adds an activity to the case's activity log. This activity serves as a record of the change in status and can include details such as the date and time of the update, as well as the user who made the change. It's a helpful feature for tracking the history of case updates and ensuring transparency among team members.
Conclusion
This feature ensures that cases under external support are handled appropriately, reflecting the current status in the system and maintaining an accurate record of case activities. It's an important aspect of managing debt cases sensitively and effectively within FinView.