 Help Center
This guide will show you how to create a payment plan in FinView. Follow these steps to set up a payment plan for a debtor on their debt collections case.
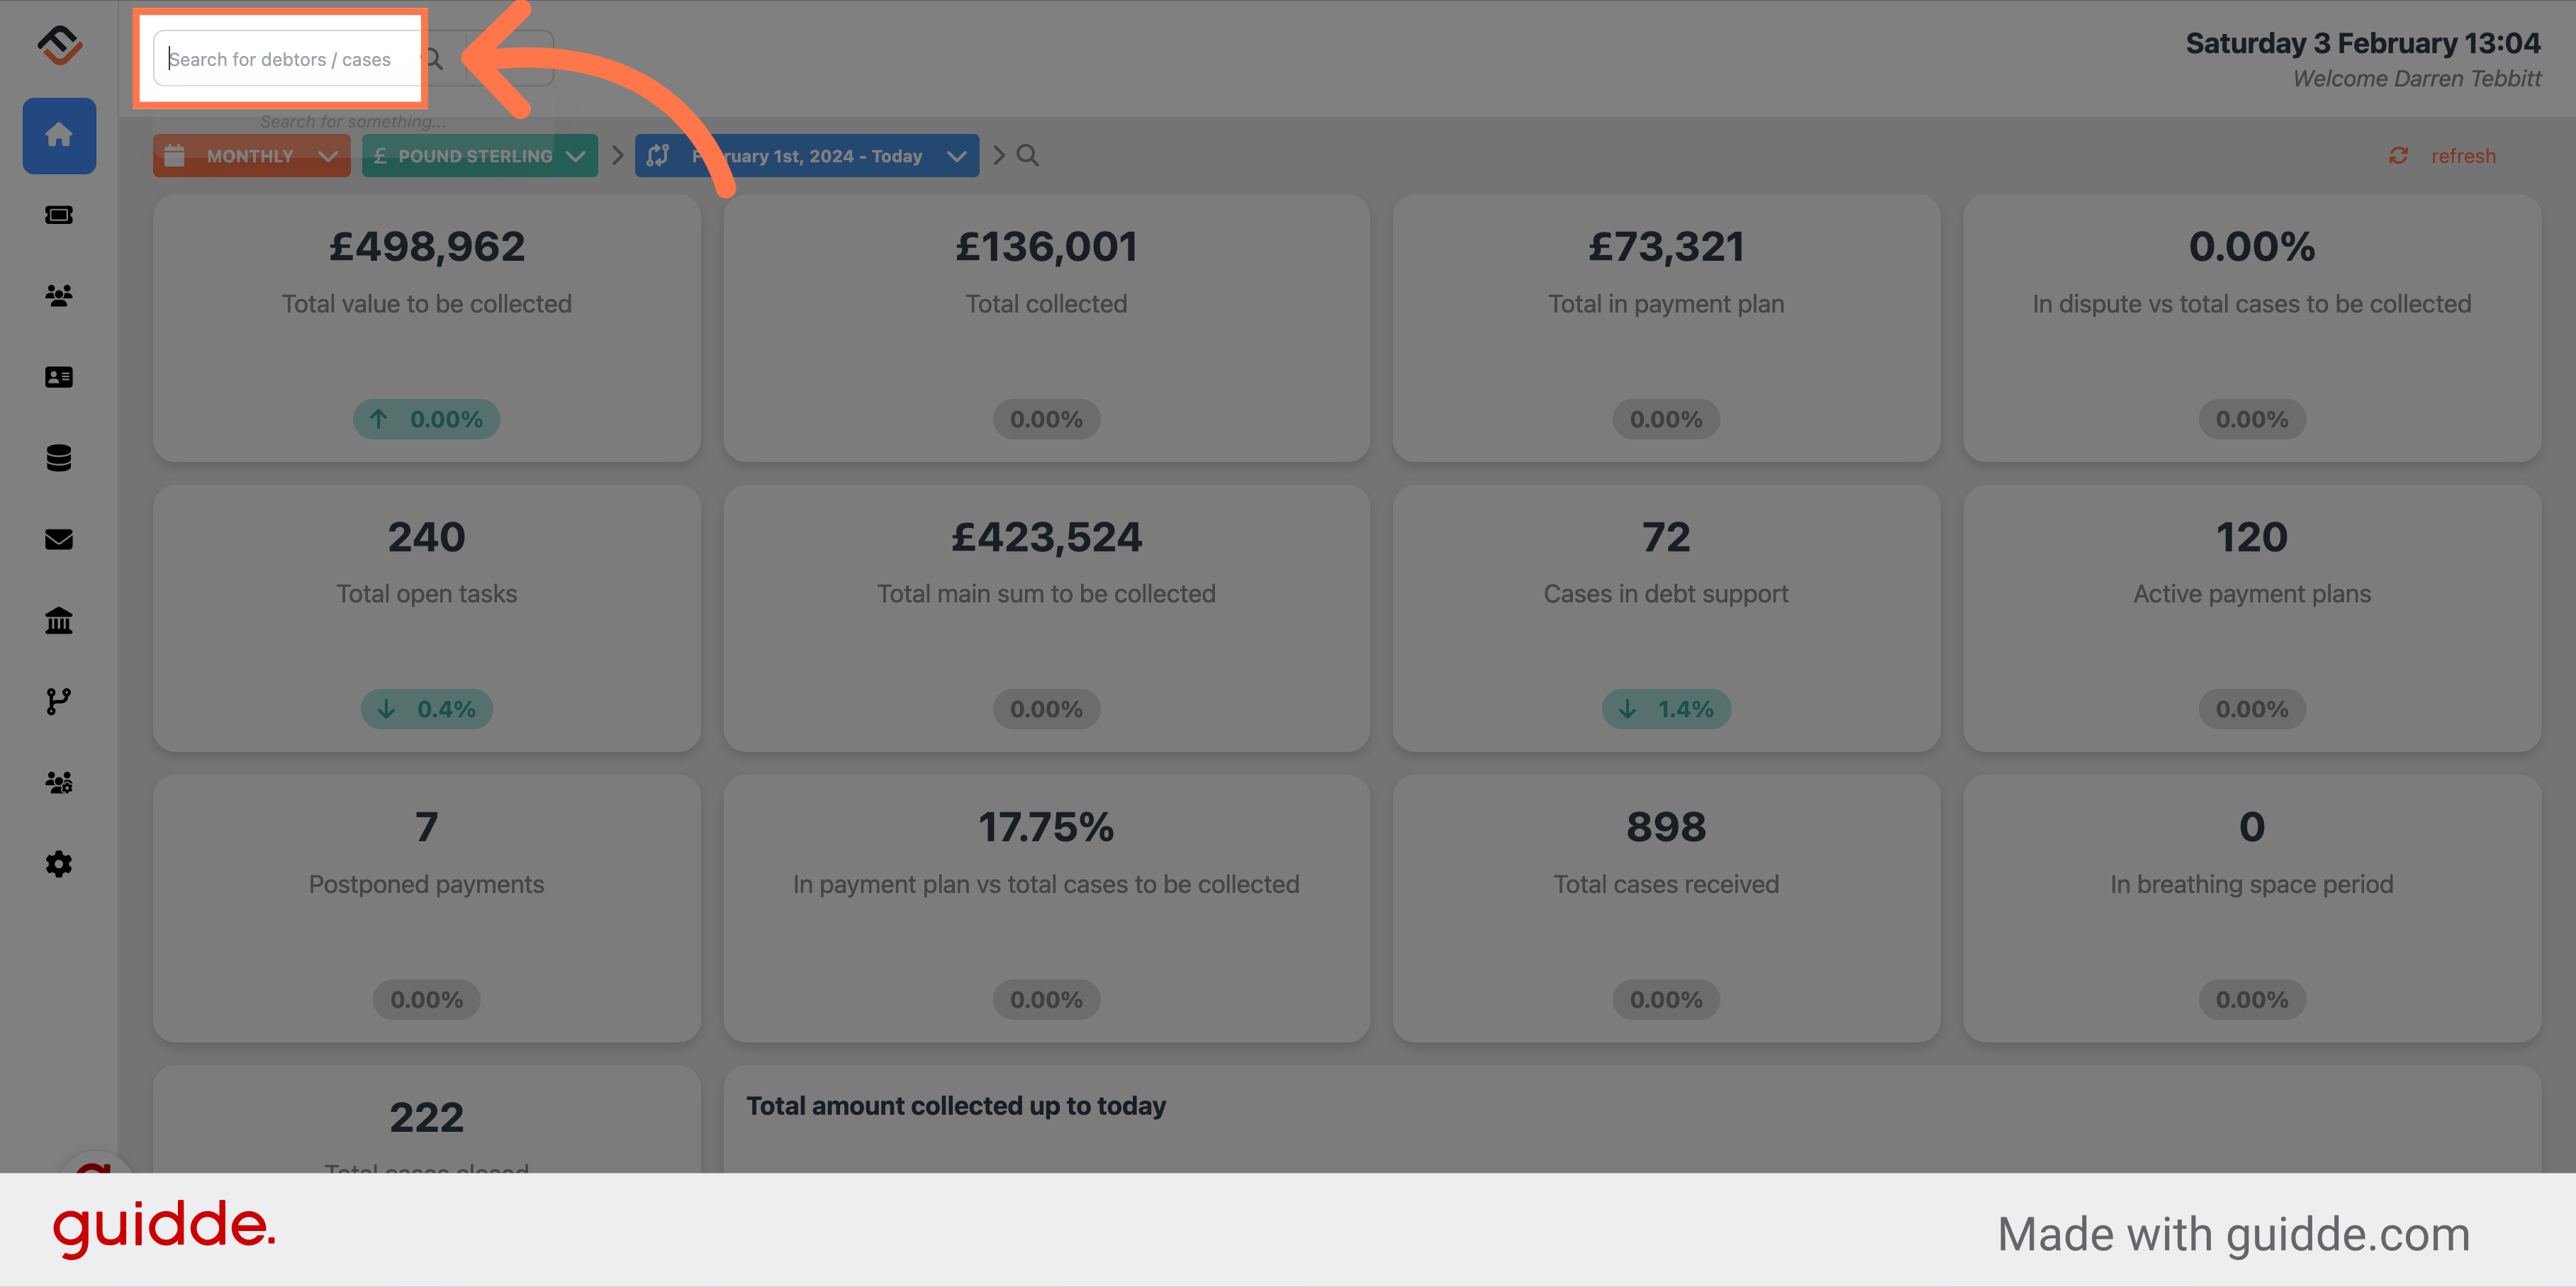
1. Navigate to the search bar on the homepage
From the home page you can search for your case. You can use the debtors name, case number, invoice number, email address or telephone to get started.
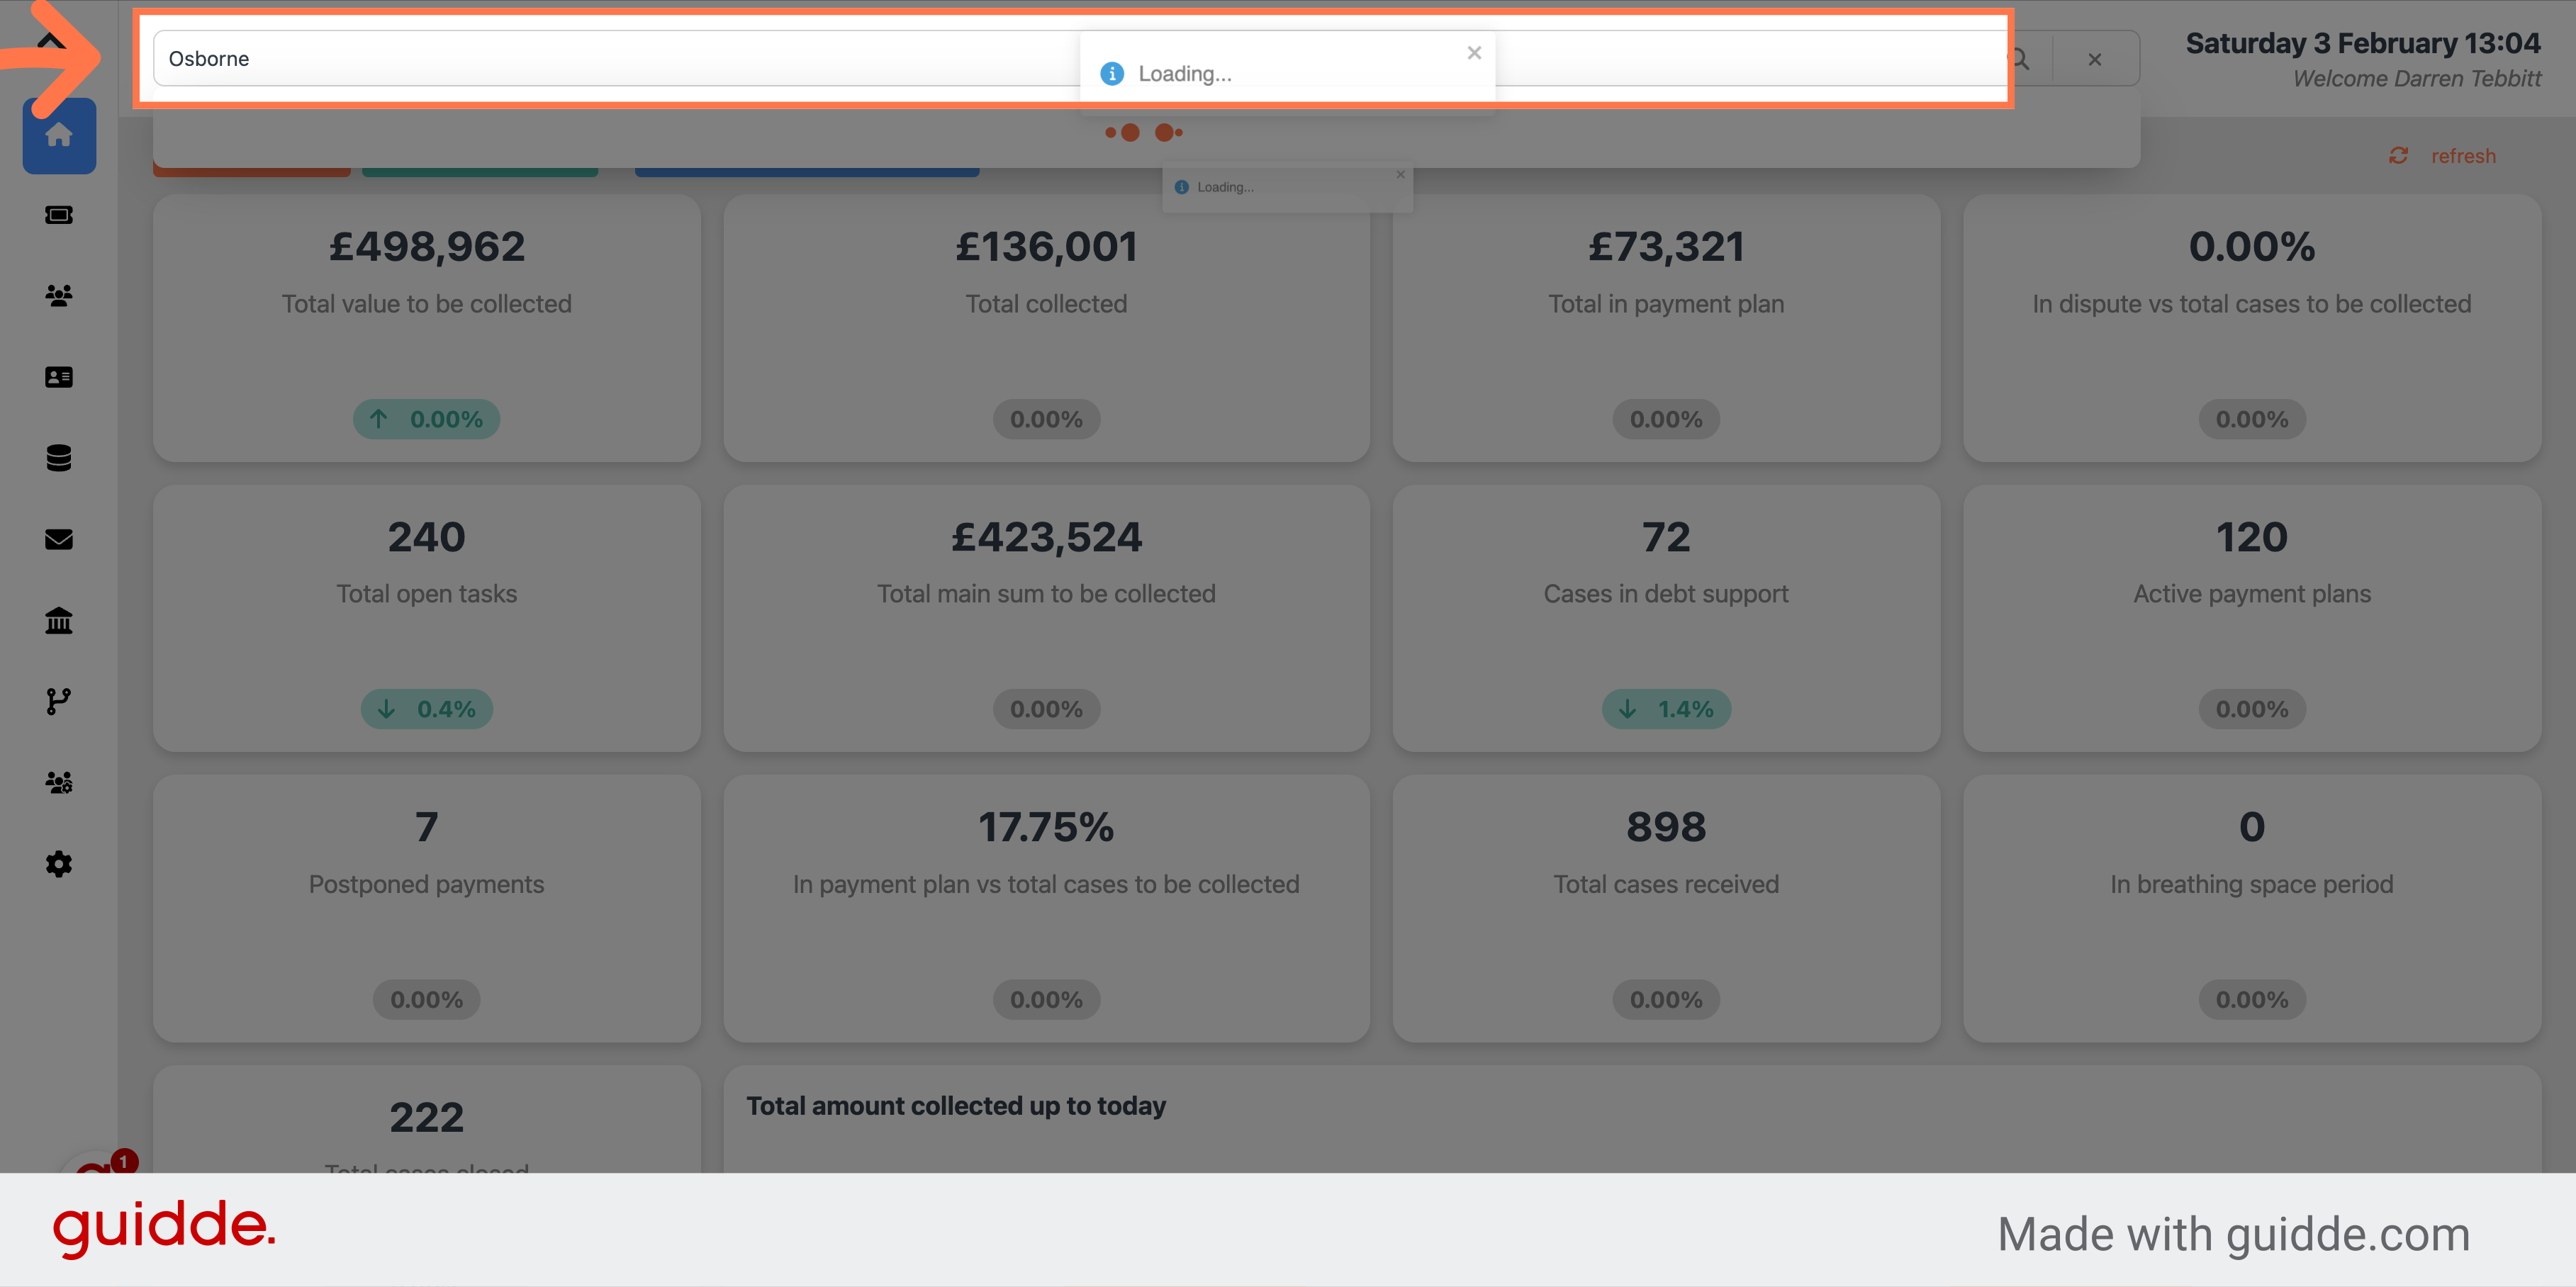
2. Search for the case
For this example we are searching for Osborne Jefferson.
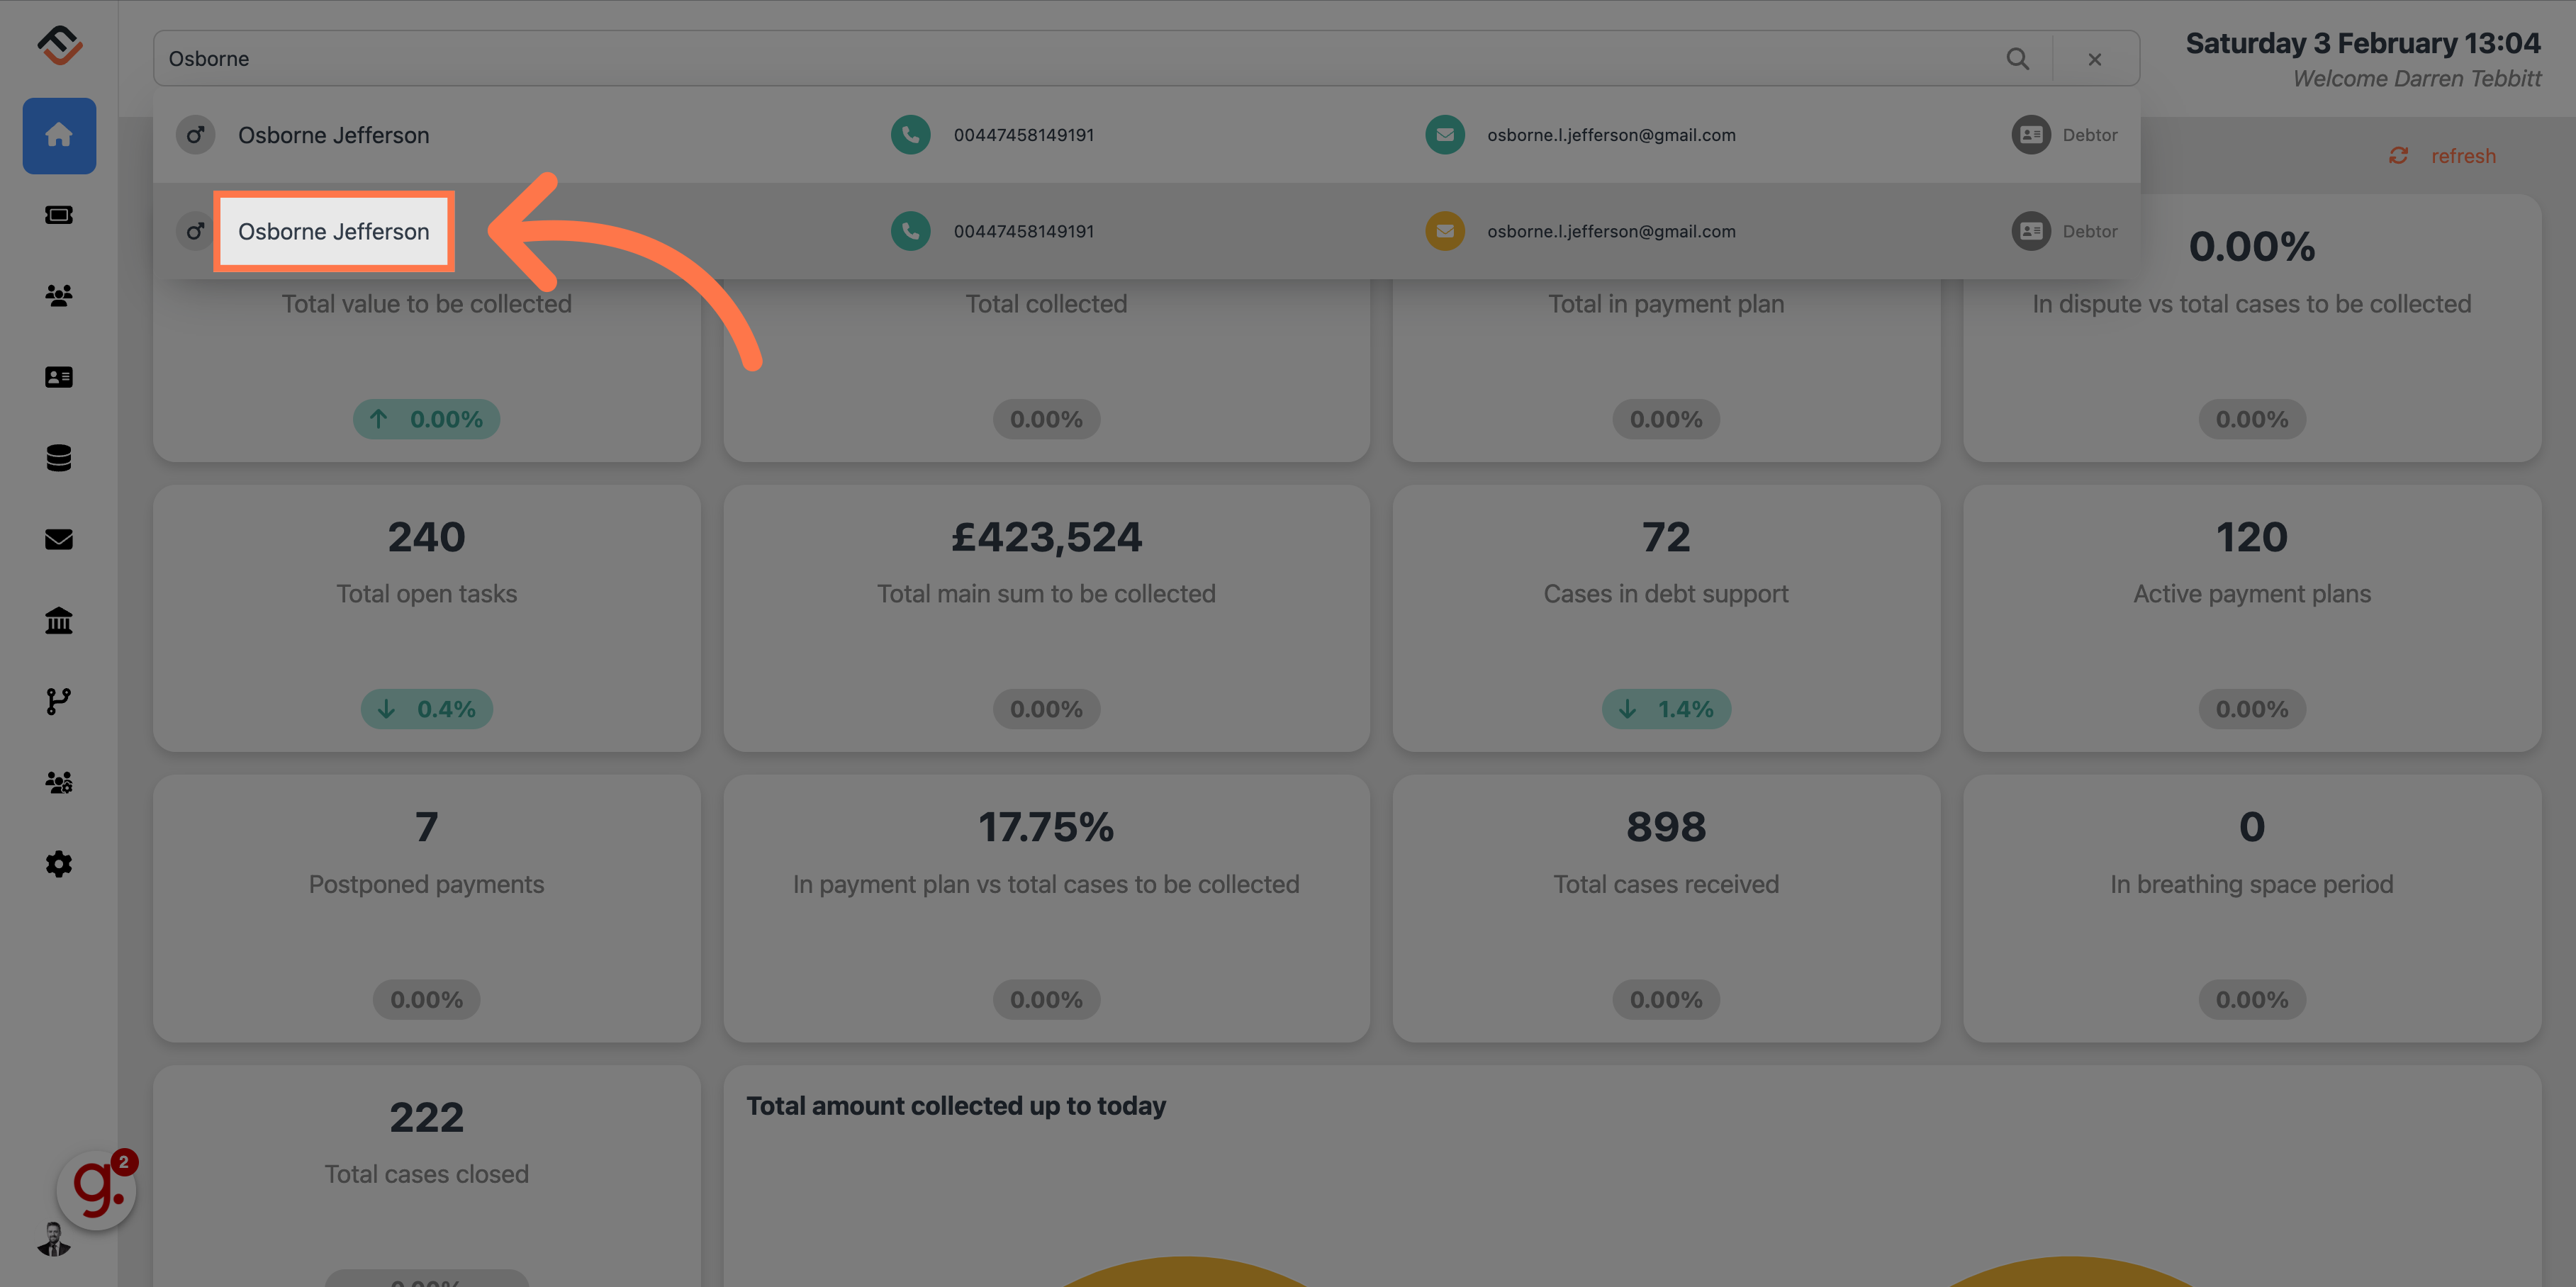
3. Click on the result
From the search result, click on the right case.
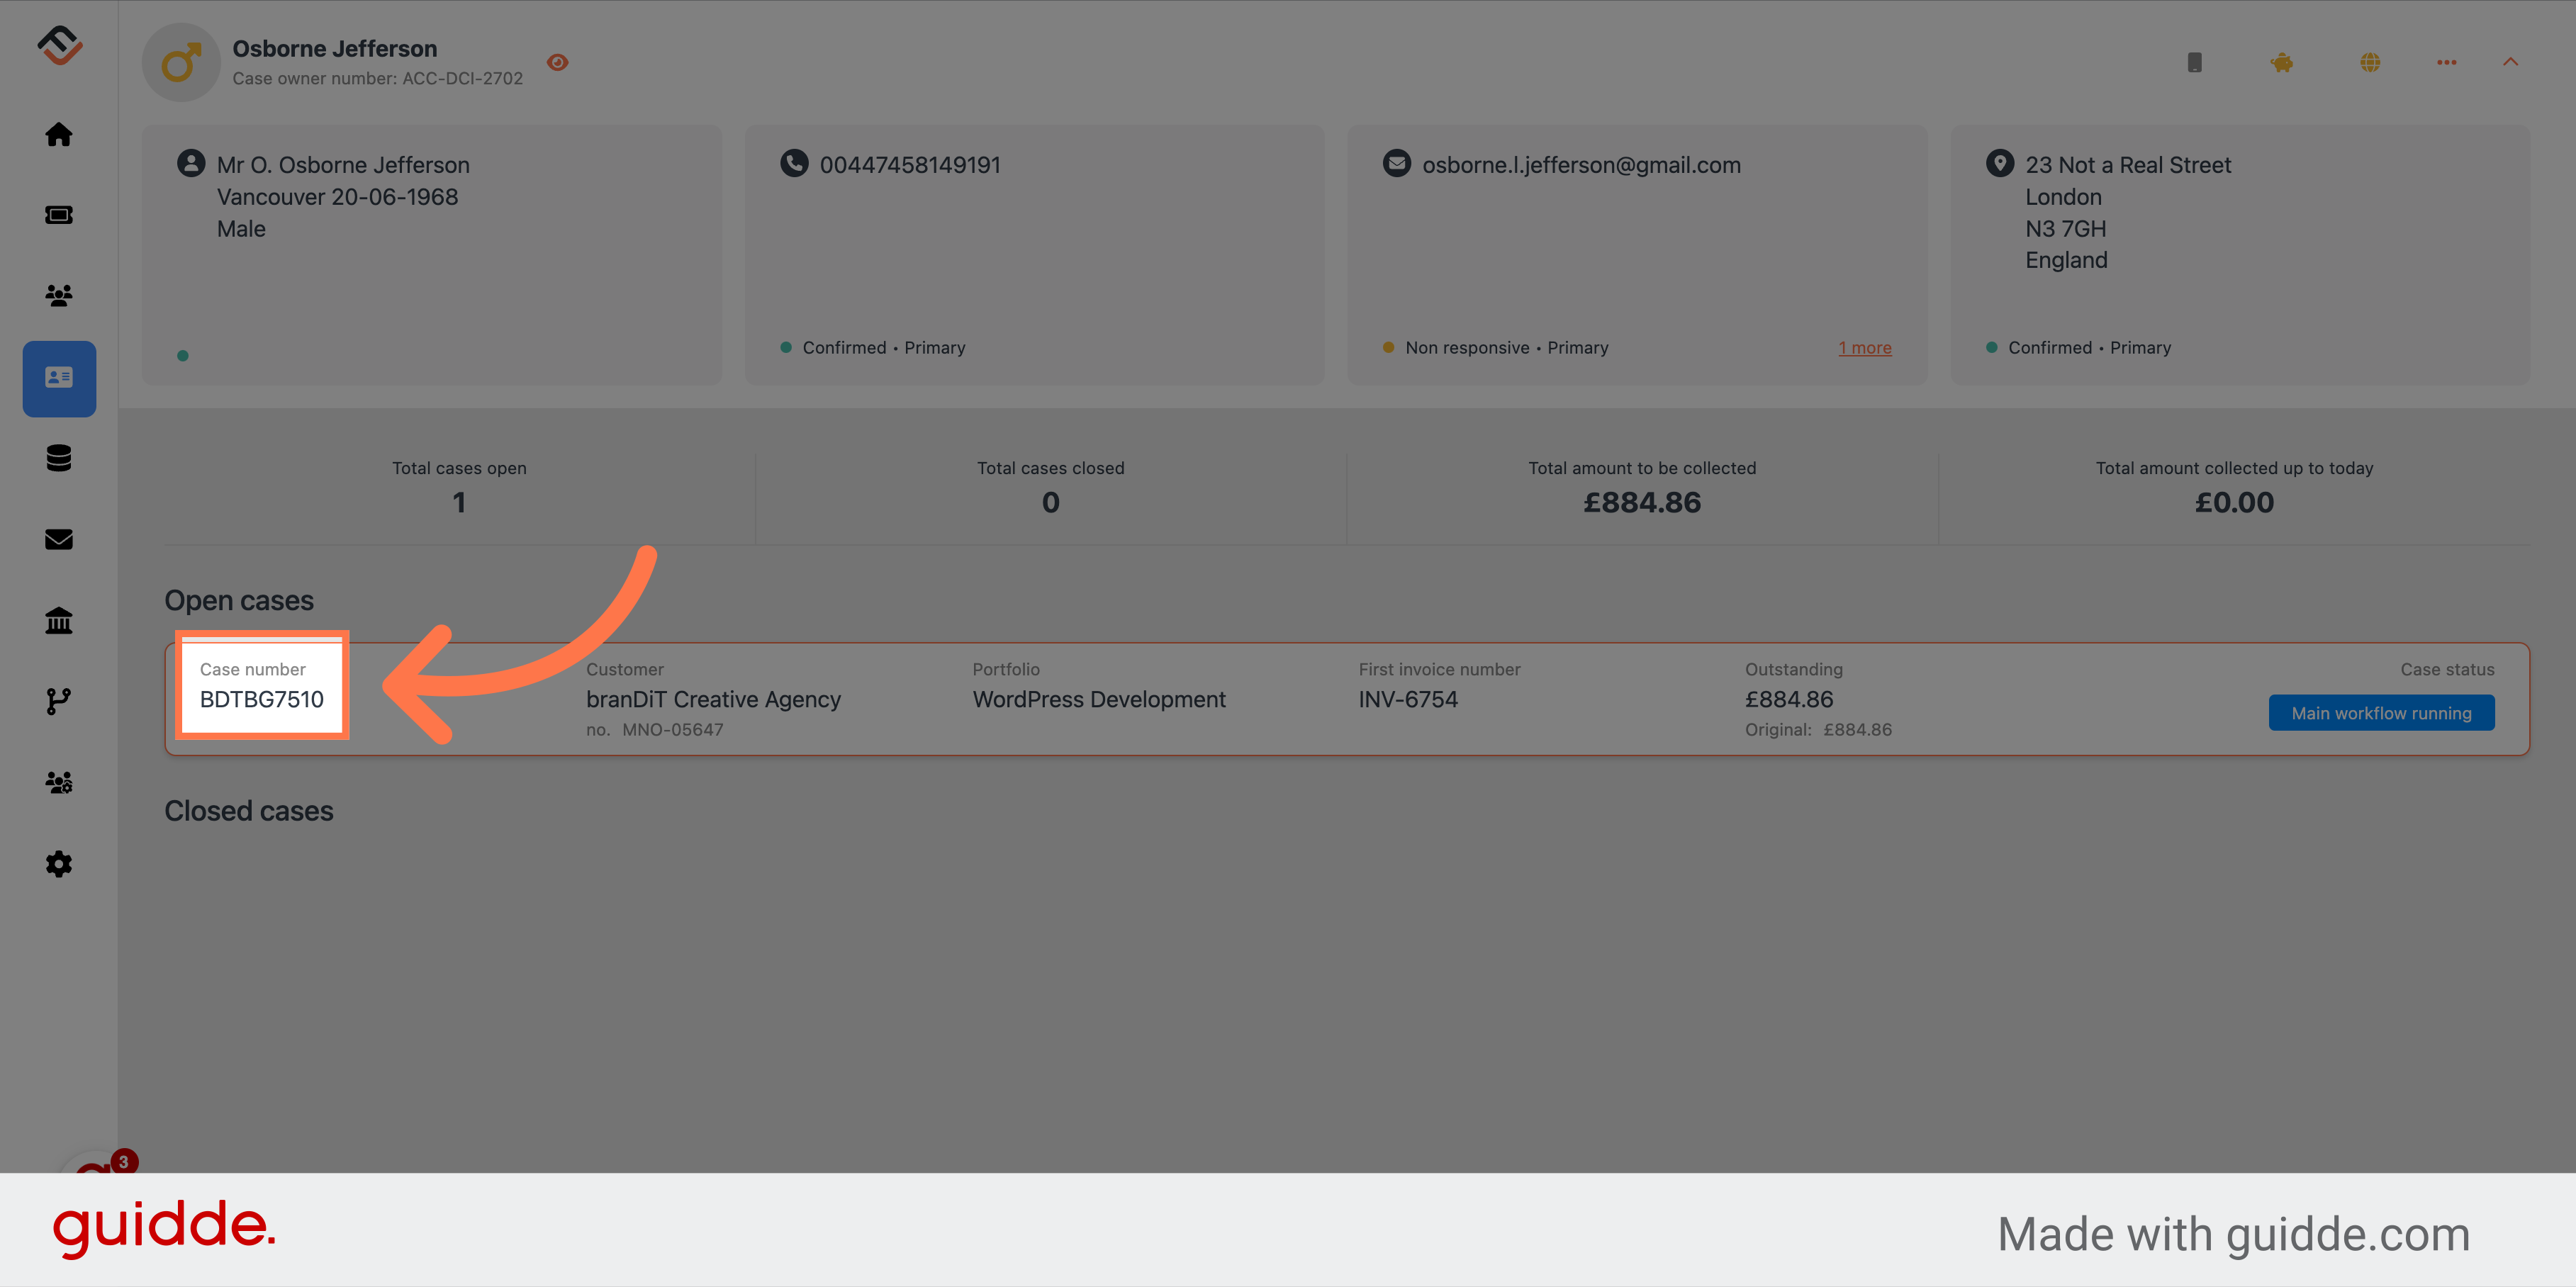
4. Select the case
From the open cases, select the case you need. You can use your mouse to hover over the case which will highlight in orange.
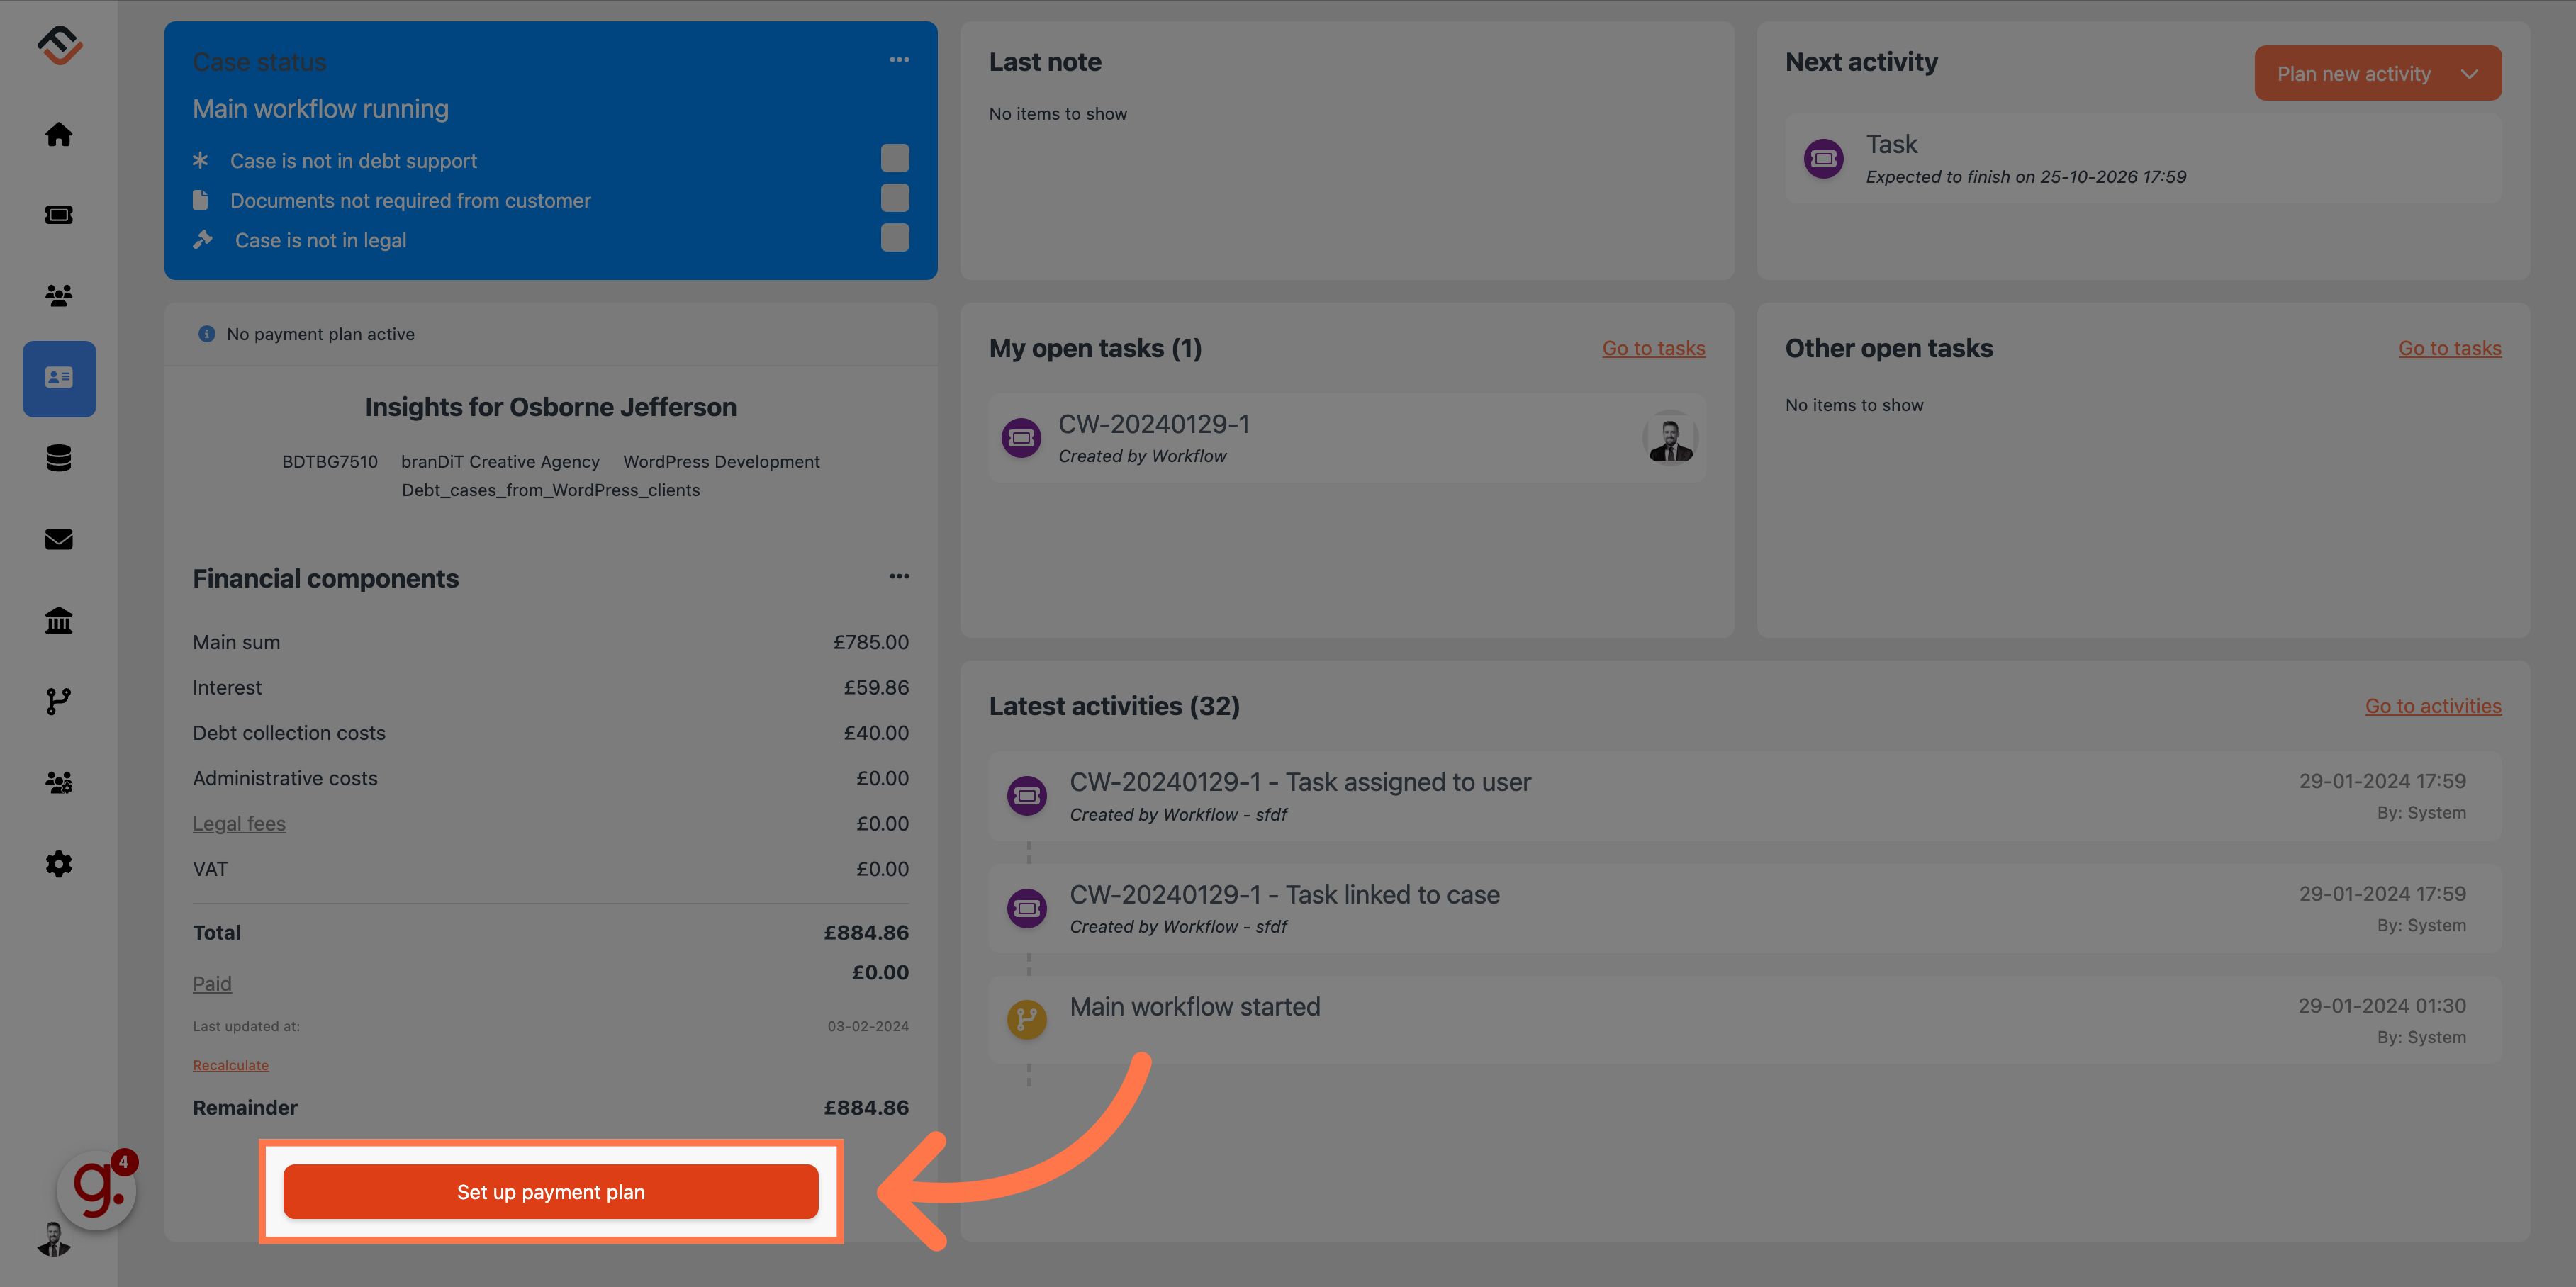
5. Click "Set up payment plan"
Under the financial insights section, click on the button "Set up payment plan"
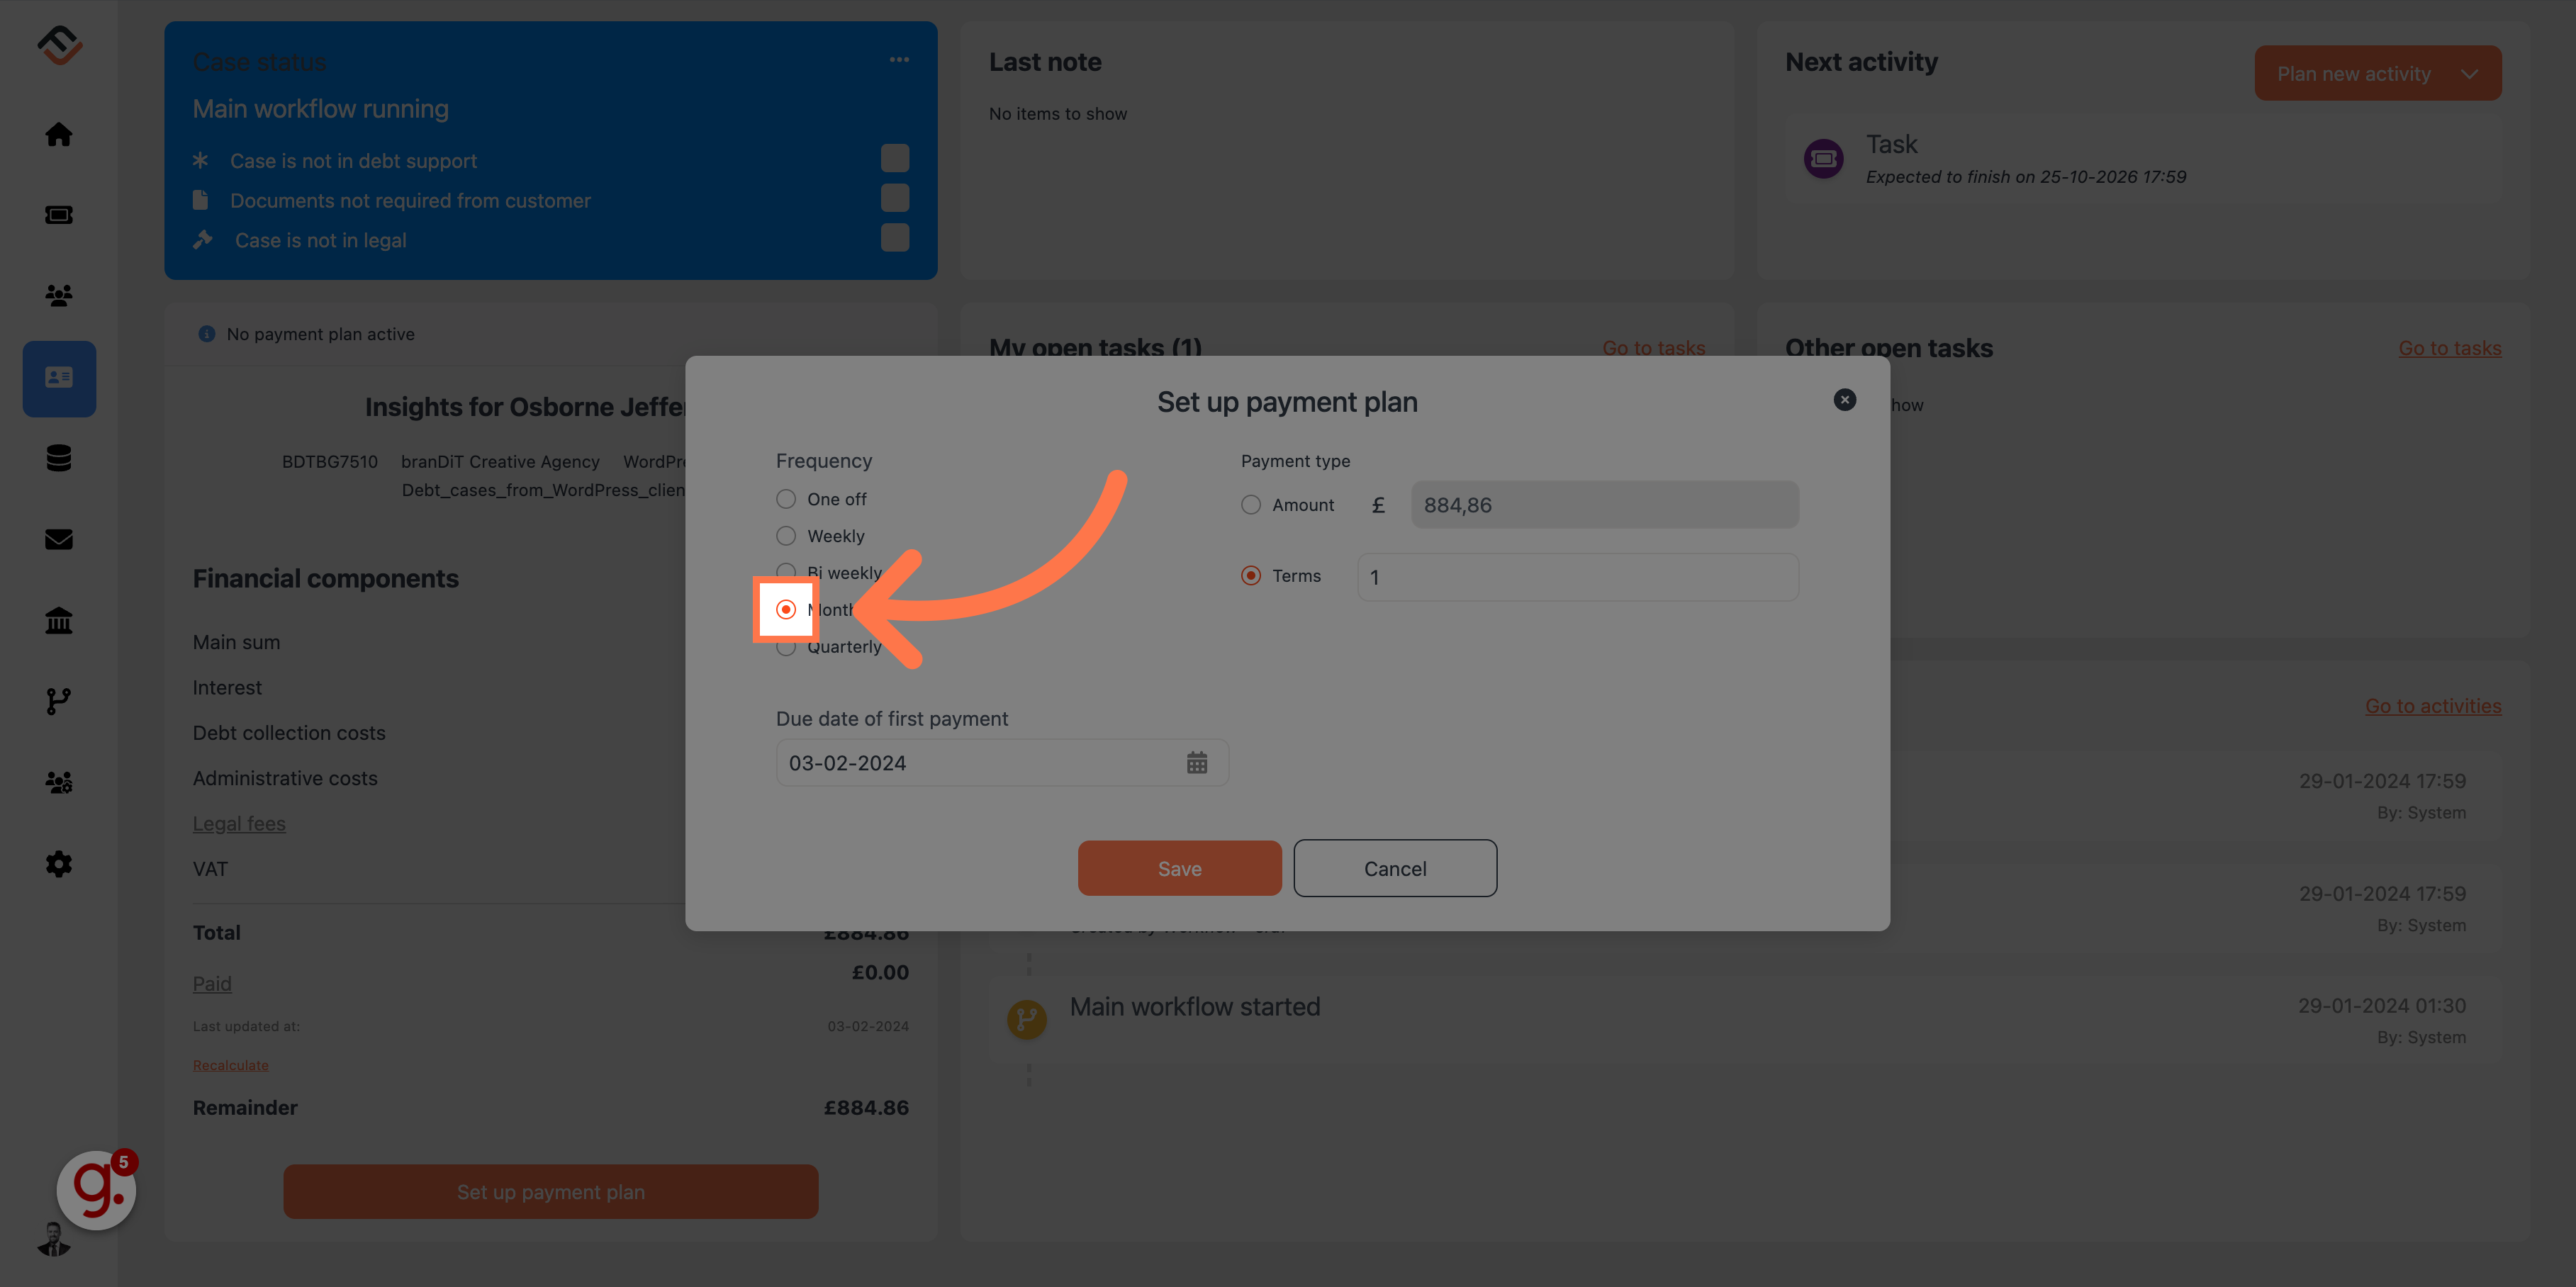
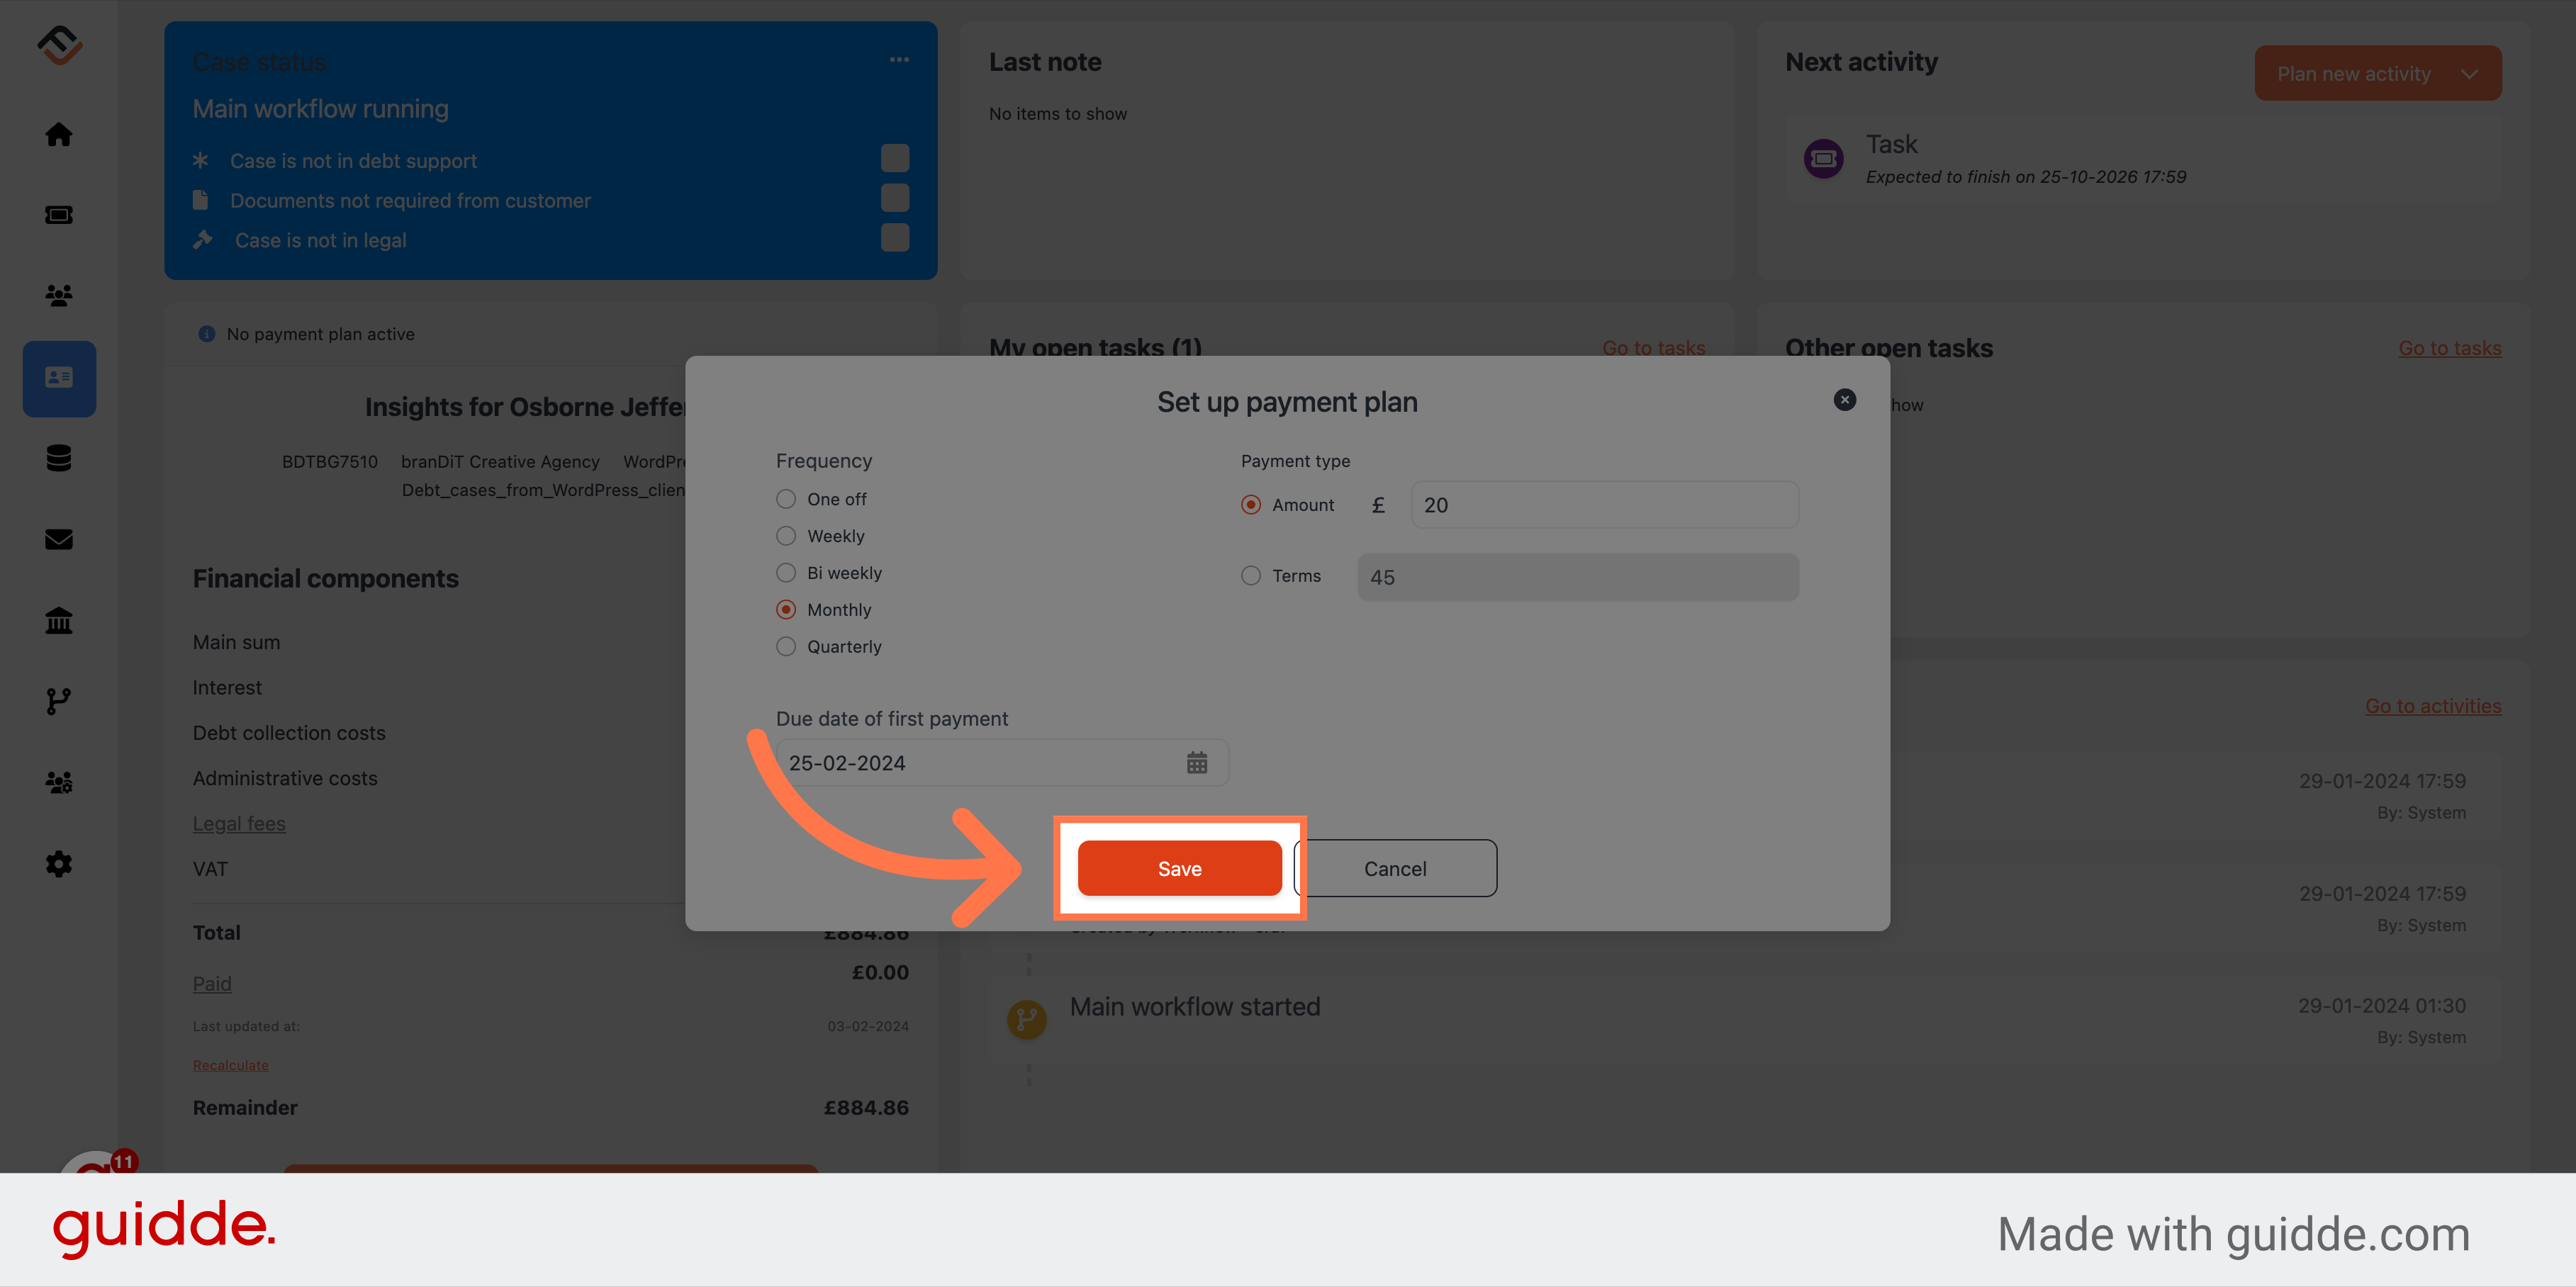
6. Choose the frequency
A debtor has different options in how often they pay. From a one-off payment to weekly or monthly, FinView enables the debtor to set their own payment plan. For this example, click on 'Monthly'.
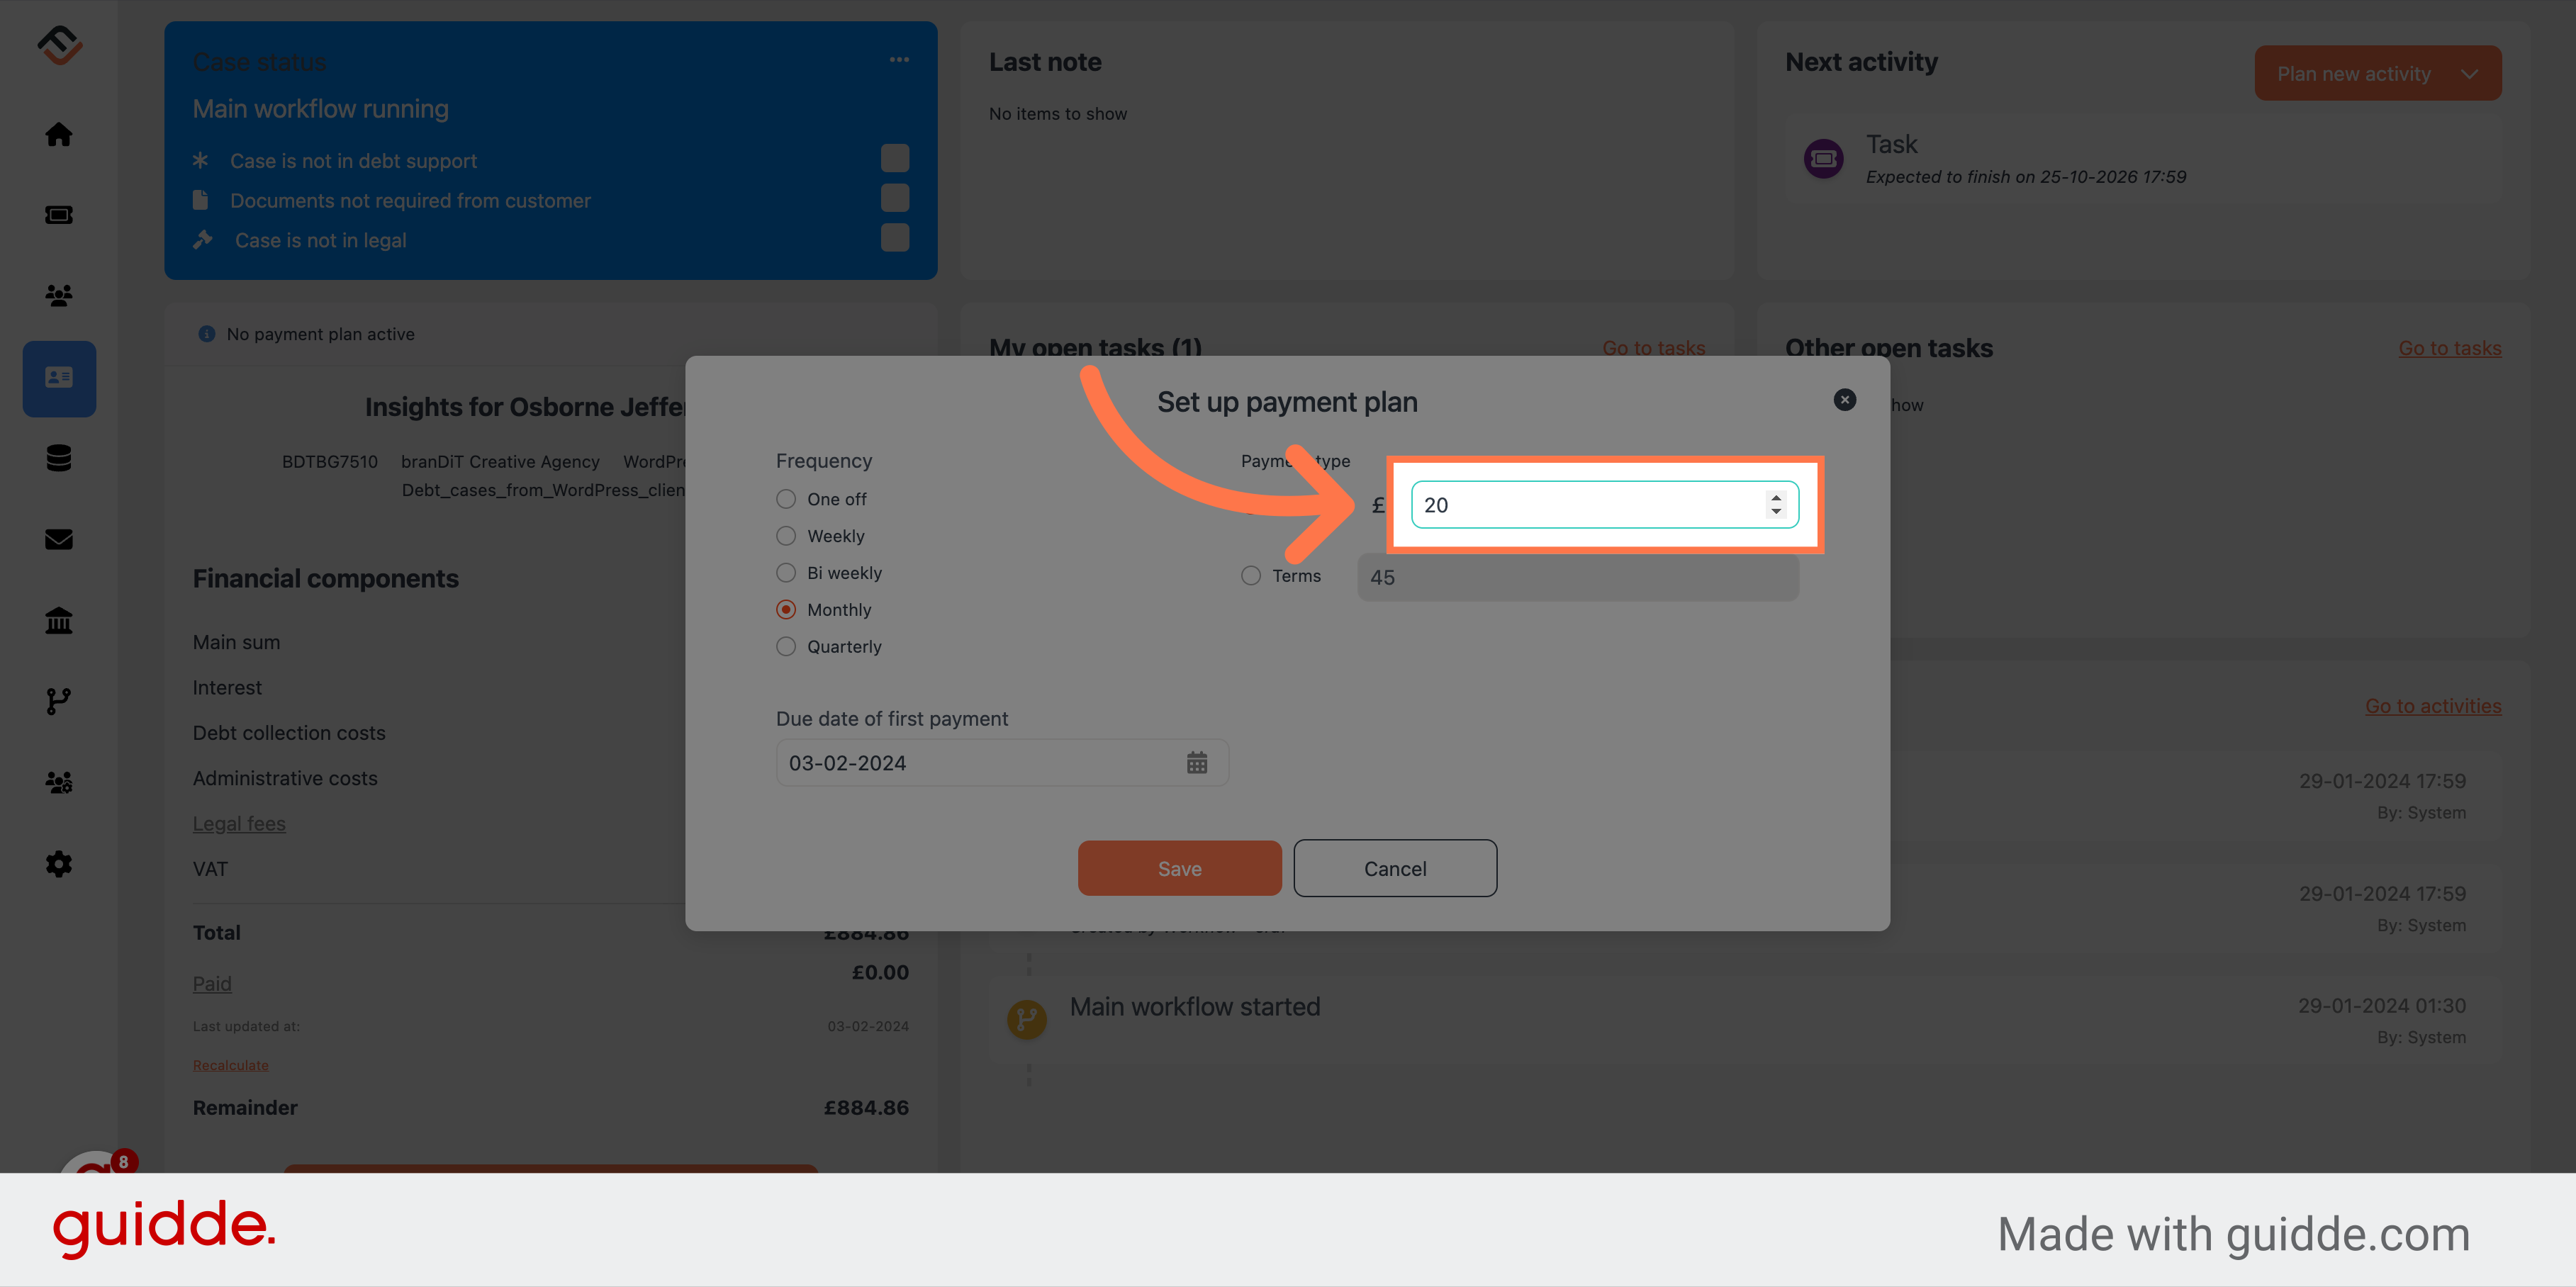
7. Define the amount
When defining the amount, you can either set a fixed amount for each payment or set the plan over a number of terms. For this example, we will define a fixed amount.

8. Enter the amount of each payment
Enter the amount of each payment. We will say £20 for this example.
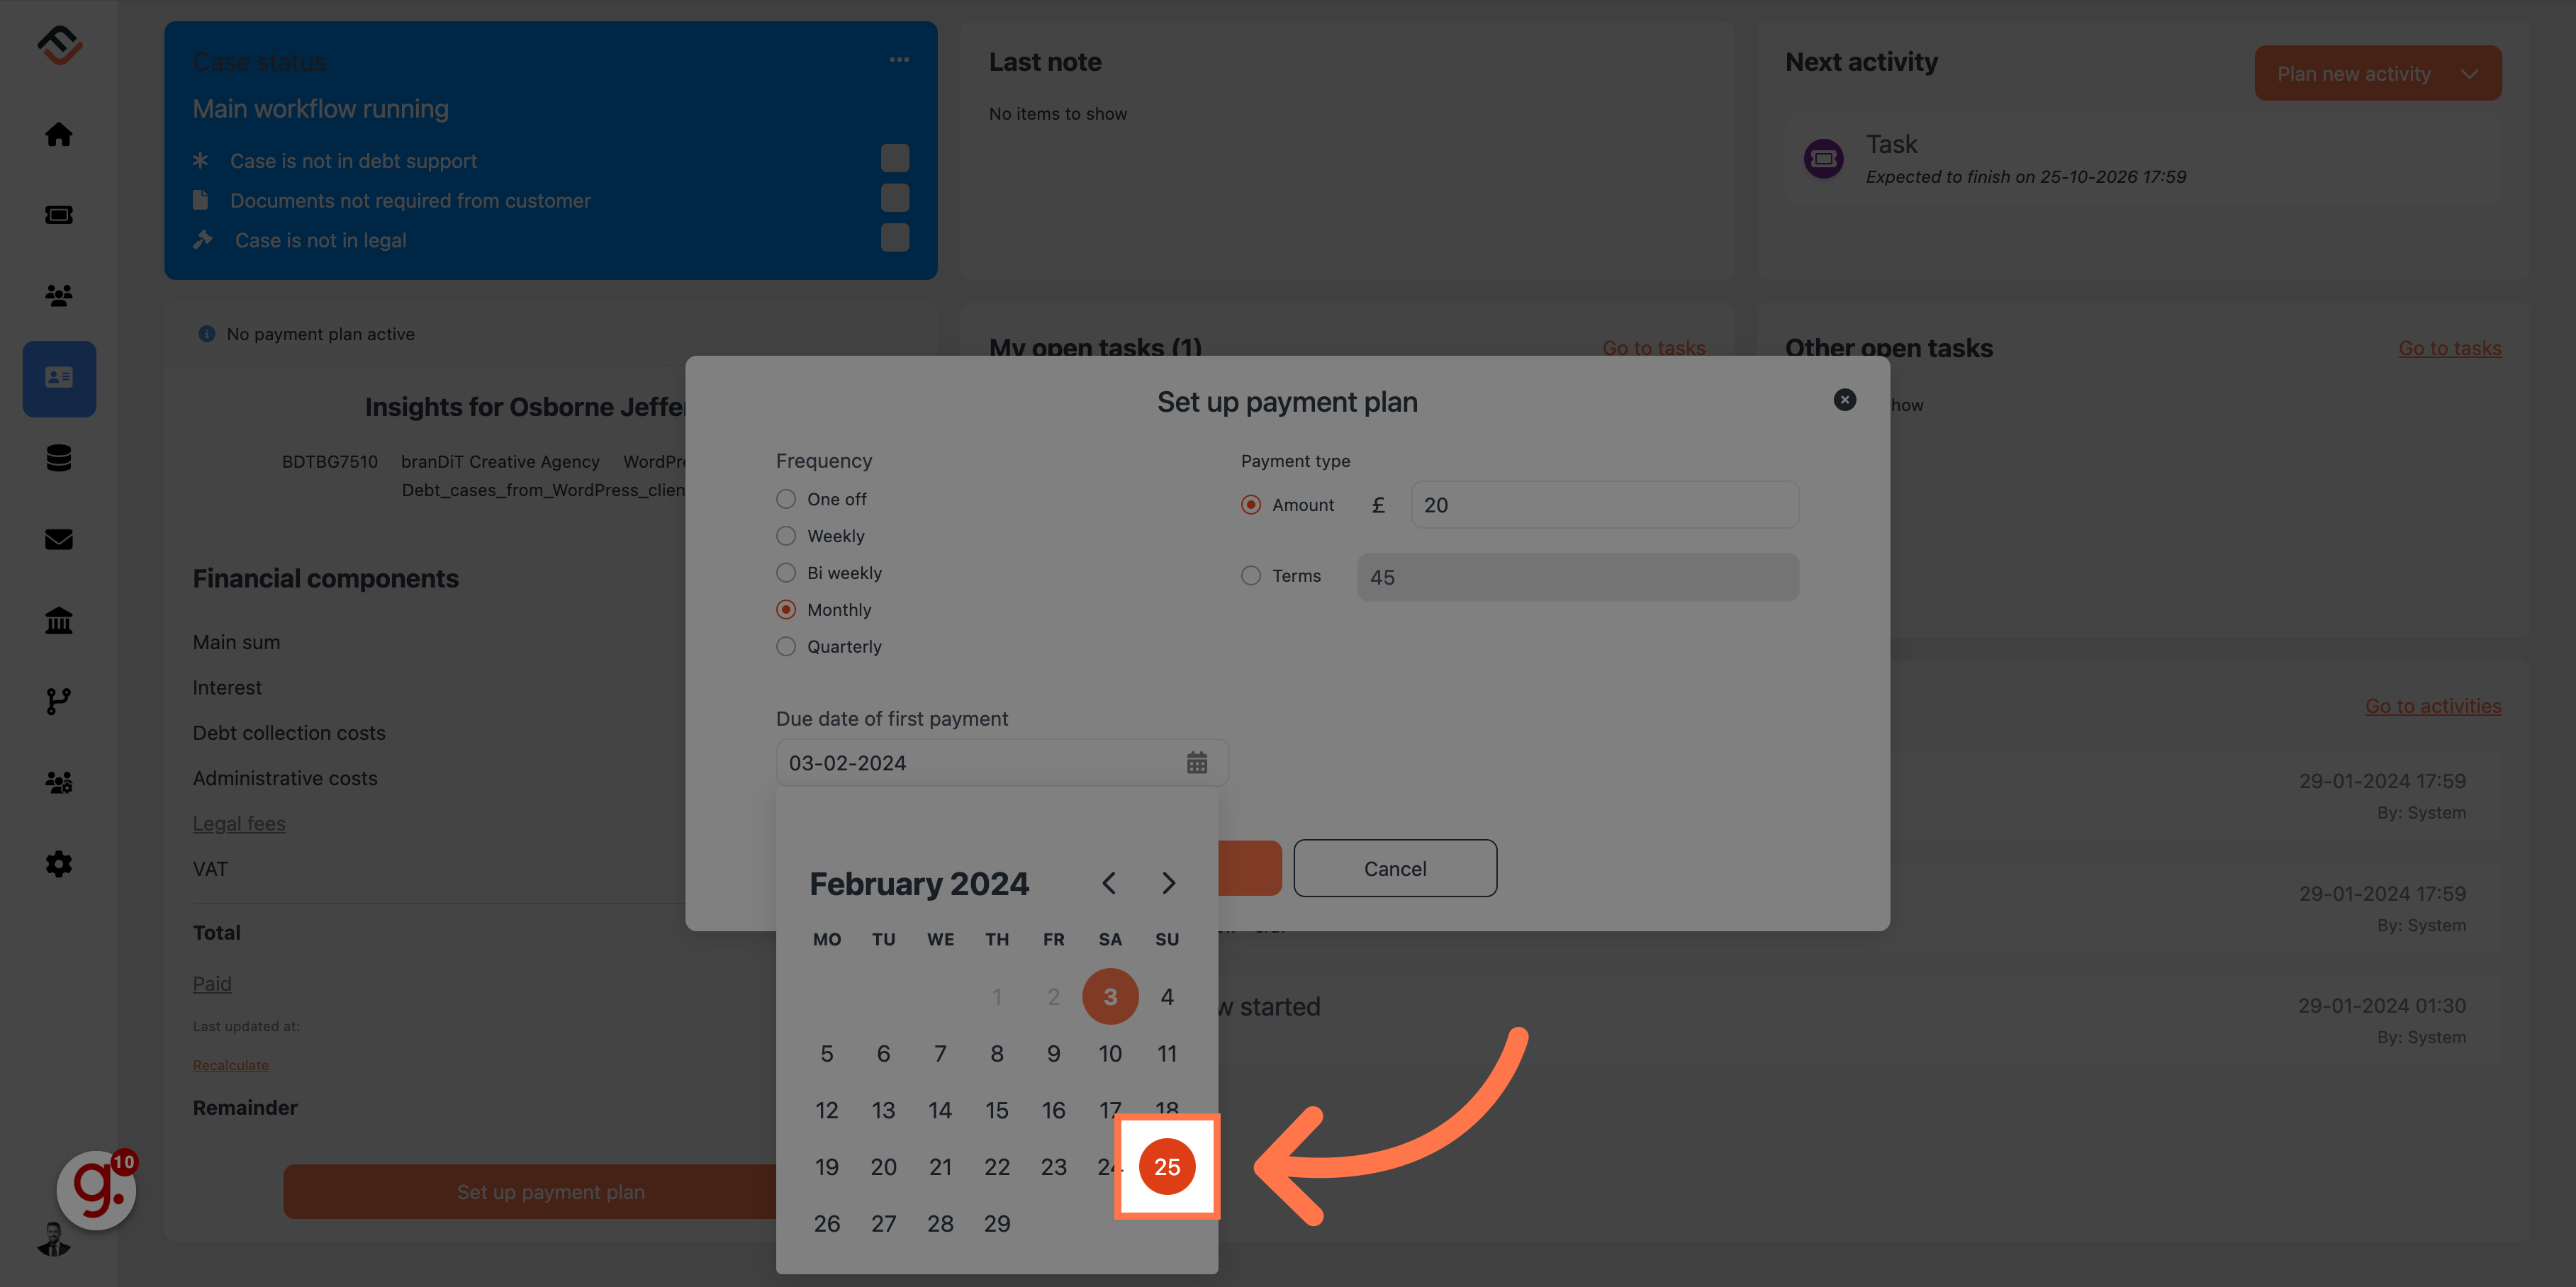
9. Set the start date of the payment plan
In the date box, enter the start date of the payment plan. Be aware, if you set the date for the 25th of the month, and you have a monthly payment plan, FinView will automatically set the plan to be due for the 25th of every month.
10. Click "Save"
Click on the "Save" button. This will create the payment plan.
11. Confirm the contact data
FinView has a cool feature which enables the user to set the contact data such as telephone and email address to confirmed. This ensures the contact data validation status does not change resulting in FinView not being able to communicate to the debtor.
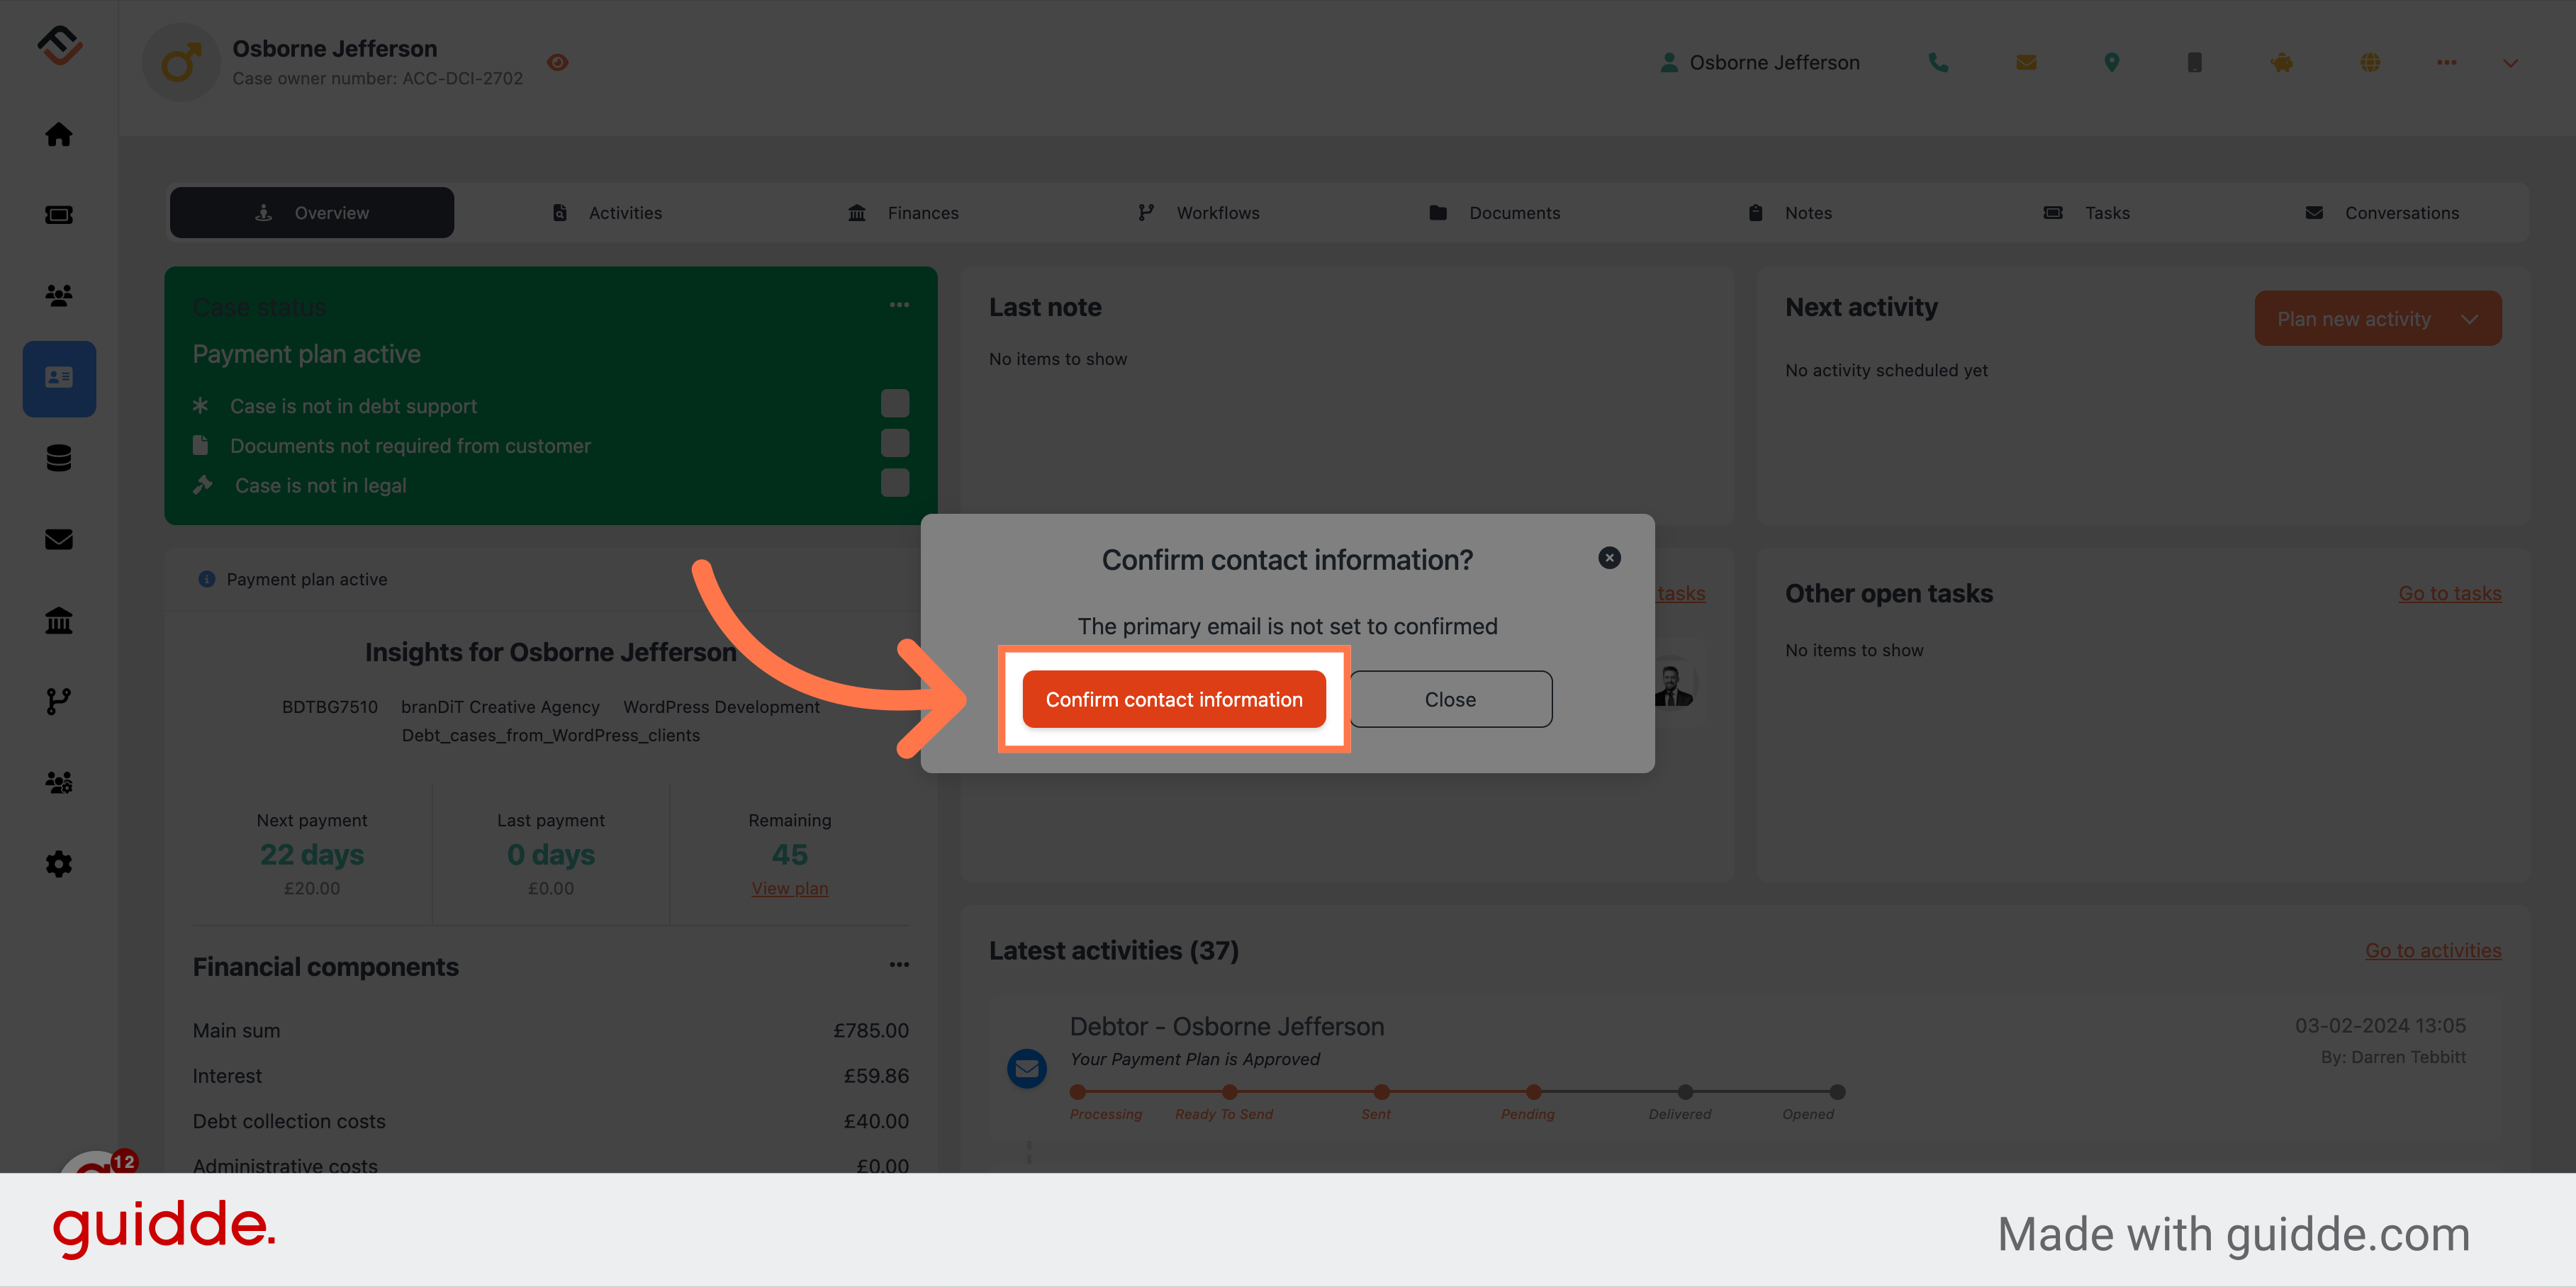
Once the contact data has been confirmed, the payment plan is now active. FinView will automatically communicate this to the debtor. The Case status will change to Payment plan active and schedule the workflow in accordance with your system payment plan settings.